Retro Gaming Weekend Project
Retro gaming is fun, and really popular on small devices like Raspberry Pi. While RetroPie may have been designed for Raspberry Pi, why not give it a try on your laptop or desktop and use all of its built-in power? It has a great UI, lots of documentation, and once it’s running it feels the most like a console. Plus, your knowledge can extend to running it on a Raspberry Pi for future weekend project fun! RetroPie is a collection of open source software for emulating retro games. It includes RetroPie itself (which helps install and manage the rest of the software), EmulationStation (the UI for browsing and launching games), RetroArch (the actual emulation management), and several actual emulators. All of this is wrapped up into one easy-to-install package. For simplicity, we’ll refer to the whole collection as RetroPie, but be sure to check out the individual projects if you want to learn more!
Materials
- Retro Controller or Keyboard - Linux Computer Check out http://www.8bitdo.com for great retro controller options that are actively supported by Linux. You can also use your keyboard if you don’t want to purchase a controller.

Install Retropie
Install on Pop!_OS, Ubuntu, or another Debian-based Linux distribution: https://retropie.org.uk/docs/Debian/ or follow the instructions below. Total time for install is only 15 minutes. A. Update and upgrade the existing APT packages: ``` sudo apt-get update && sudo apt-get upgrade ``` B. Install the needed packages for the RetroPie setup script: ``` sudo apt-get install git dialog unzip xmlstarlet ``` C. Type ‘y’ and press enter when prompted D. Download the latest RetroPie setup script: ``` sudo apt-get install git dialog unzip xmlstarlet ``` E. Enter the folder with the setup script: ``` cd RetroPie-Setup ``` F. The script is executed with: ``` sudo ./retropie_setup.sh ``` G. Select OK in the next prompt

H. The screen should look like/similar this at this point:
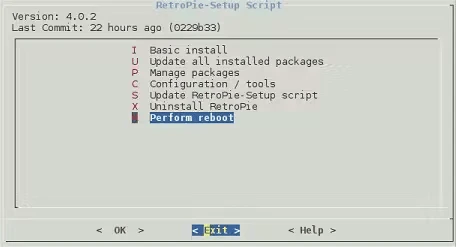
I. Select “Basic Install’ and allow the packages time to install. Then select YES to install the core and main packages.

J. This step may take a few minutes. In the mean time, you can search the interwebs for some ROMS. K. Once the install is complete, select, ‘perform reboot.’ Answer ‘yes’ when prompted to reboot.
DOWNLOADING ROMS
Once the install is complete, you’ll want to get some ROMs! We suggest searching for openly sourced homebrewed ROMs. You can search ‘Open Source’ or ‘Open License’ game ROMs to find these games! Be sure to save your ROMs into their respective folder in the “RetroPie” folder in your user’s Home folder. For example: ~/RetroPie/roms/nes. Sometimes you’ll need to extract the game files from a .zip. For example, we downloaded a ROM that had a .zip file, which extracted a .nes ROM file. The .nes ROM file is the file to move into the ~/RetroPie/roms/nes folder. Once you have a few ROMs downloaded and moved into the RetroPie folder, it’s time to configure your keyboard or controller and get playing!
CONFIGURE THE CONTROLLER
Before you begin game play make sure your controller is already plugged in via USB or connected via Bluetooth. If you don’t already own a controller you can use your keyboard for gameplay. If you are in the market for a controller, we’ve found that the best controllers are generic USB ones, or PlayStation controllers connected via USB work well. A. Launch the game for the first time using the following command ``` emulationstation ``` If you don’t already own a controller you can use your keyboard for gameplay. If you are in the market for a controller, we’ve found that the best controllers are generic USB ones, or PlayStation controllers connected via USB work well. Before you begin game play make sure your controller is already plugged in via USB or connected via Bluetooth. When you first boot your system for gameplay you will be prompted to configure your controller.
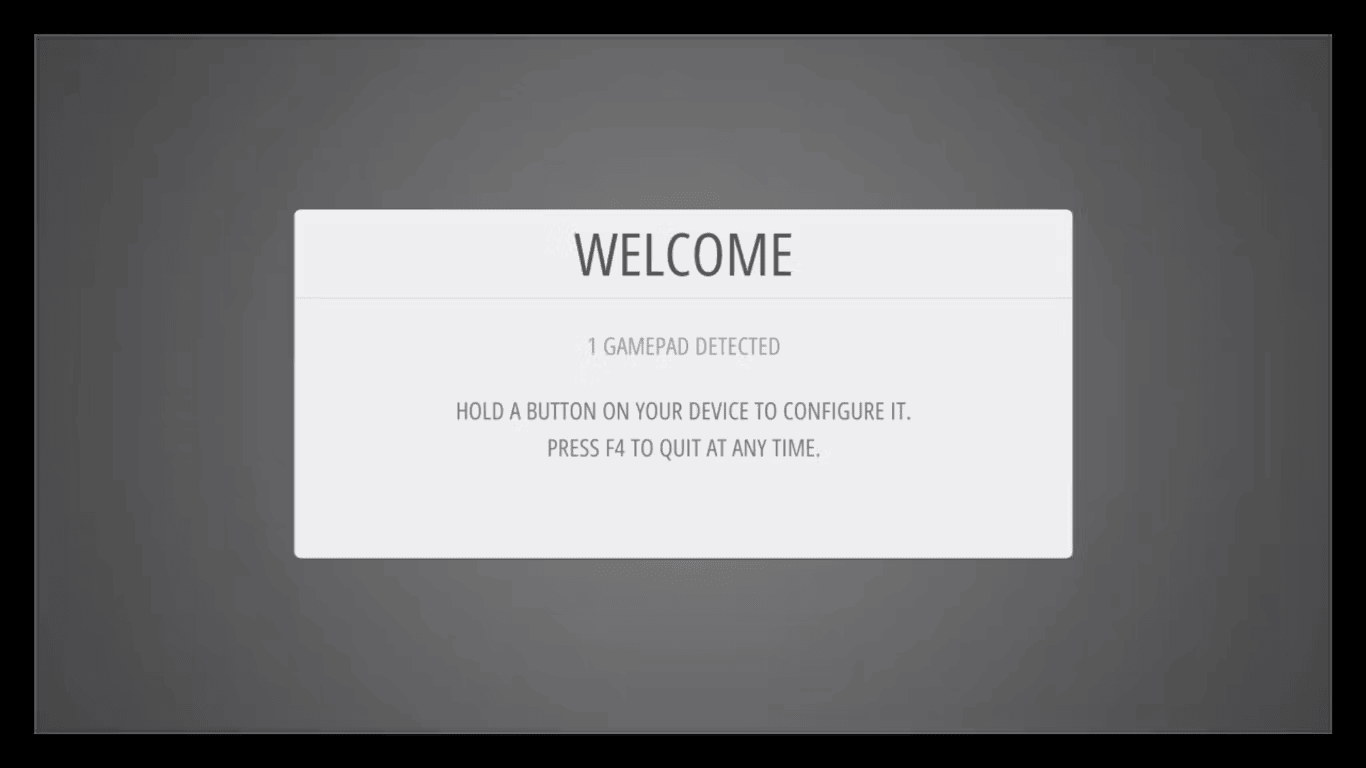
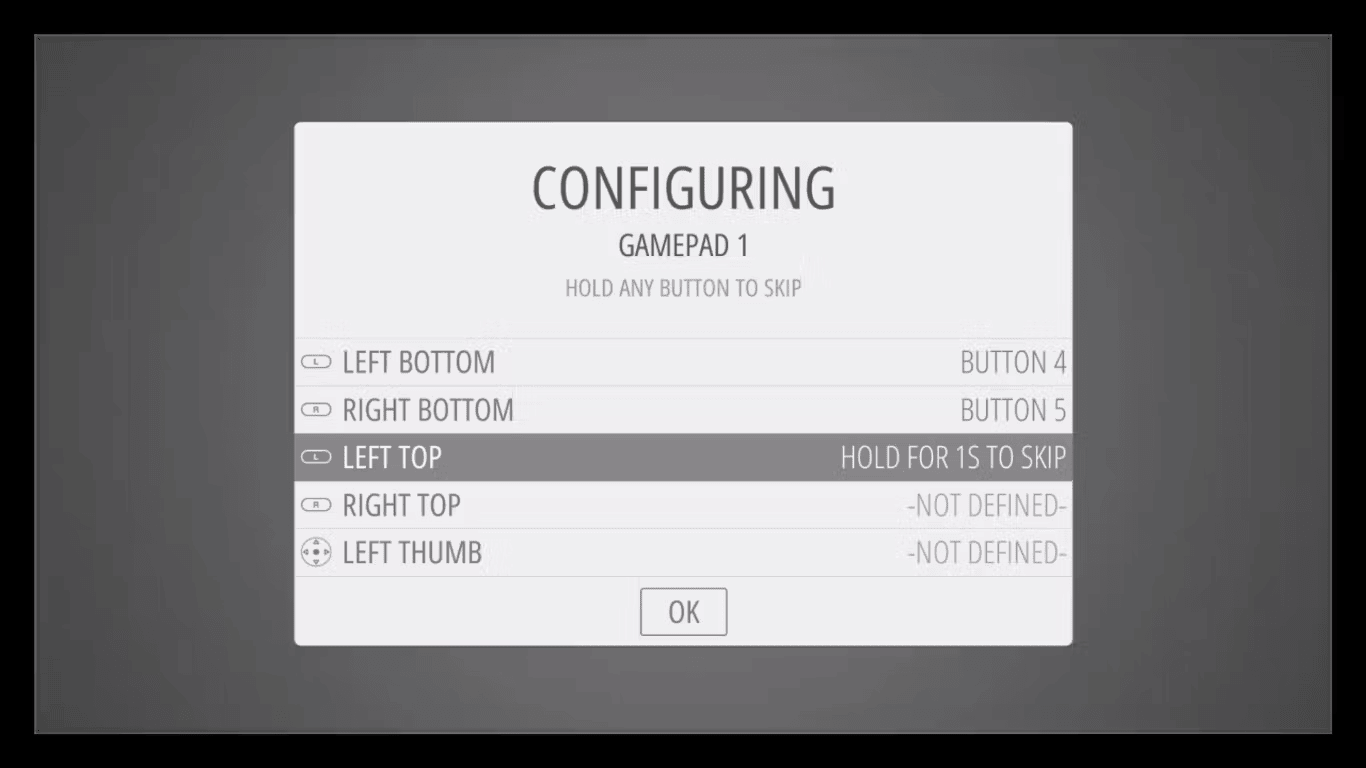
B. Hold down any button on your controller or keyboard to begin configuring your controller.
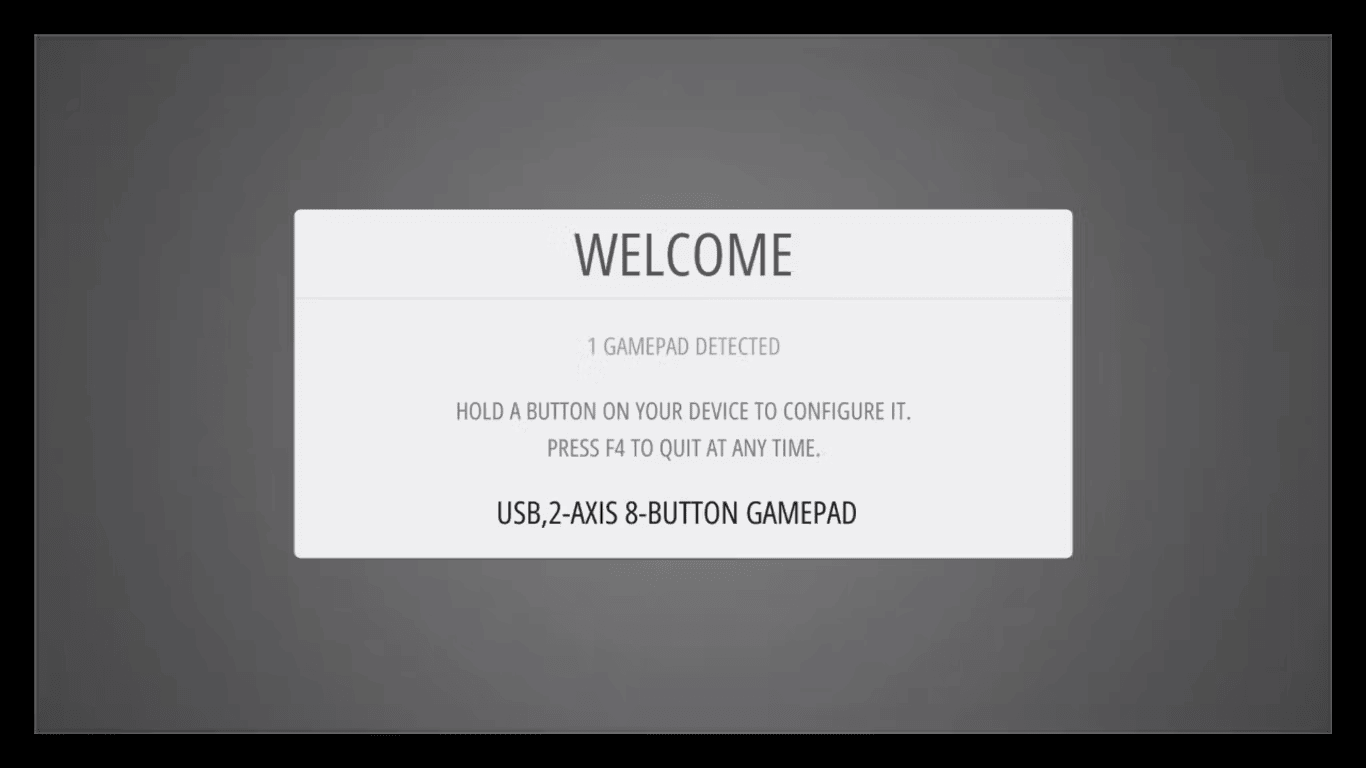
C. Follow the prompts to configure each button that is associated with gameplay. If you run out of buttons, on your controller or keyboard, hold down any button to skip each unused button. For the Hotkey, we recommend using your controller’s “Select” button. When you get to OK press the button you have configured as "A".
D. Back at the RetroPie screen, there should now be a game console name showing how many games there are available. Press ‘A’ to launch the console, then select the desired game and press A again.
HELPFUL HINTS FOR GAMEPLAY
1. The buttons to press in the UI will generally be listed along the bottom of the screen. Broadly speaking, [A] is confirm, [B] is back, [Start] is the menu. 2. Press the Hotkey (we recommended setting it as [Select]) and [Start] buttons simultaneously to quit any game. 3. Press [F4] on your keyboard to quit the RetroPie entirely, or hit [Start] and navigate the menu to “Quit EmulationStation”. 5. [SUPER]+ [Q] works as a shortcut to exit the emulator in Pop!_OS.
sources
- Download reference: https://retropie.org.uk/docs/Debian/ - Controllers: https://retropie.org.uk/docs/First-Installation/#configure-controller