
Turn Your Launch Keyboard into a MIDI Controller
If you can type, then you, too, can play a musical instrument! For this fun weekend project, we'll guide you through the steps to transform your Launch keyboard into a versatile MIDI controller to send those sweet, sweet melodic signals to your computer to perform. In a few simple steps, you'll unlock the full potential of your Launch keyboard and embark on a musical adventure for the ages.
Materials
• Any System76 Launch Keyboard • Any Digital Audio Workstation (DAW) (Ardour, Reaper, Ableton, etc.) • Your computer • Pop!_OS 22.04 LTS (Recommended)
Install on the keyboard
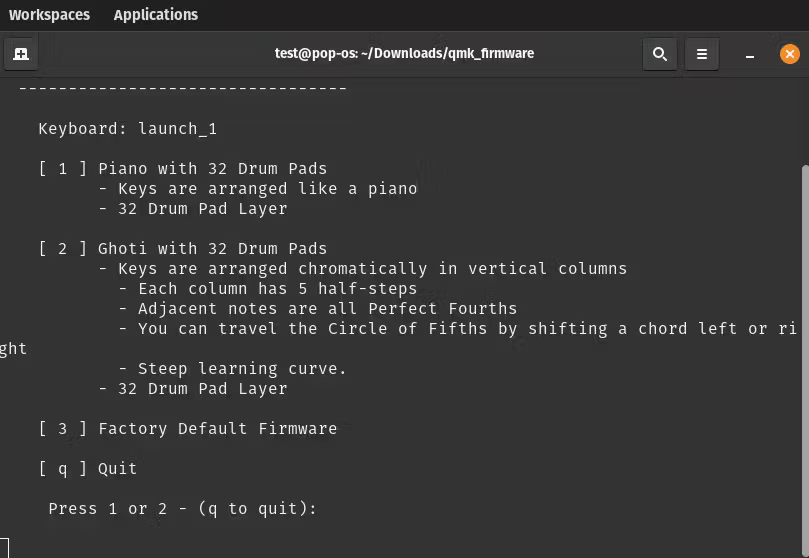
With your Launch keyboard plugged into the computer, open the terminal and type the following command: ``` git clone https://github.com/garrettjwilke/qmk_firmware ```
``` cd qmk_firmware ```
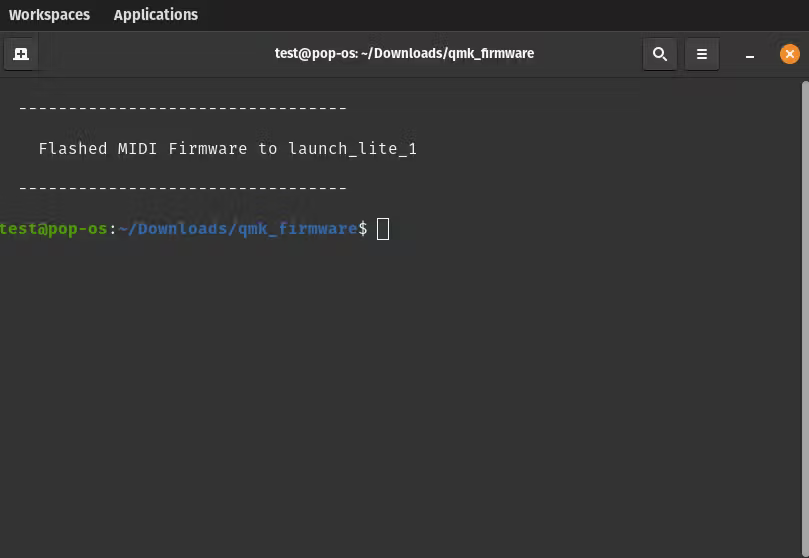
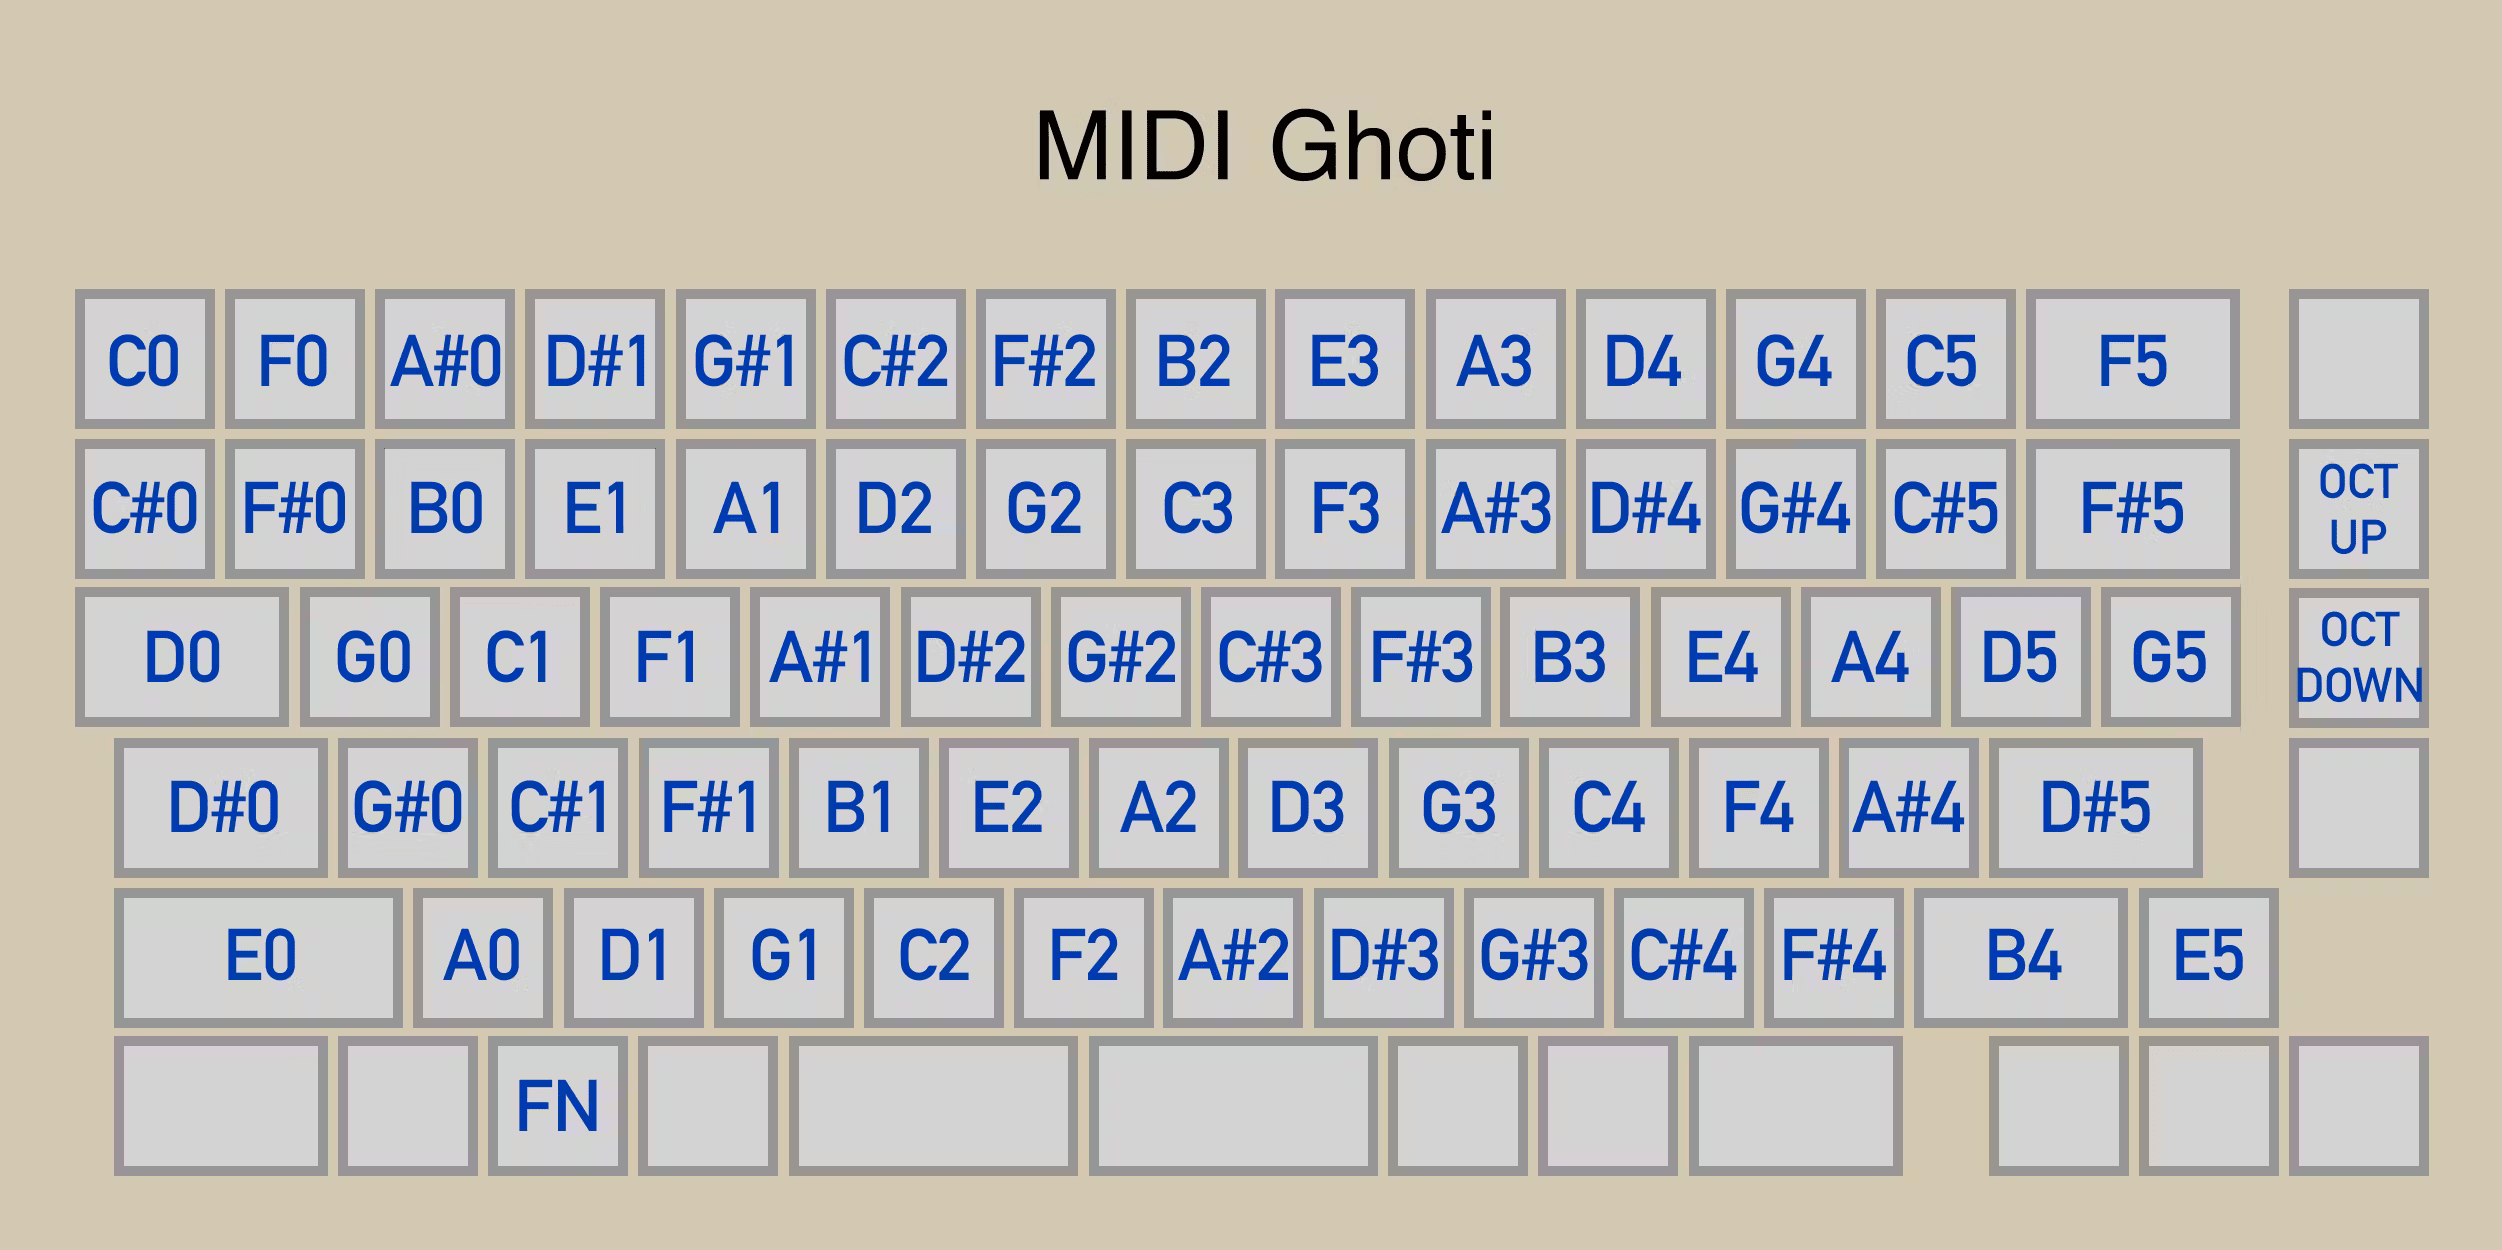
``` ./launch-midi.sh ``` Hit Enter to run it. If a question pops up asking if you want to install dependencies, type “Y” and hit Enter again. Wait a few minutes for the command to process. Once it’s done, you’ll be given the option to install either the piano or ghoti instrument. Ghoti here is a piano configured for a vertically oriented keyboard...though in reality it's actually a fish. Note: If you have a Launch Lite, only the piano will be installed.
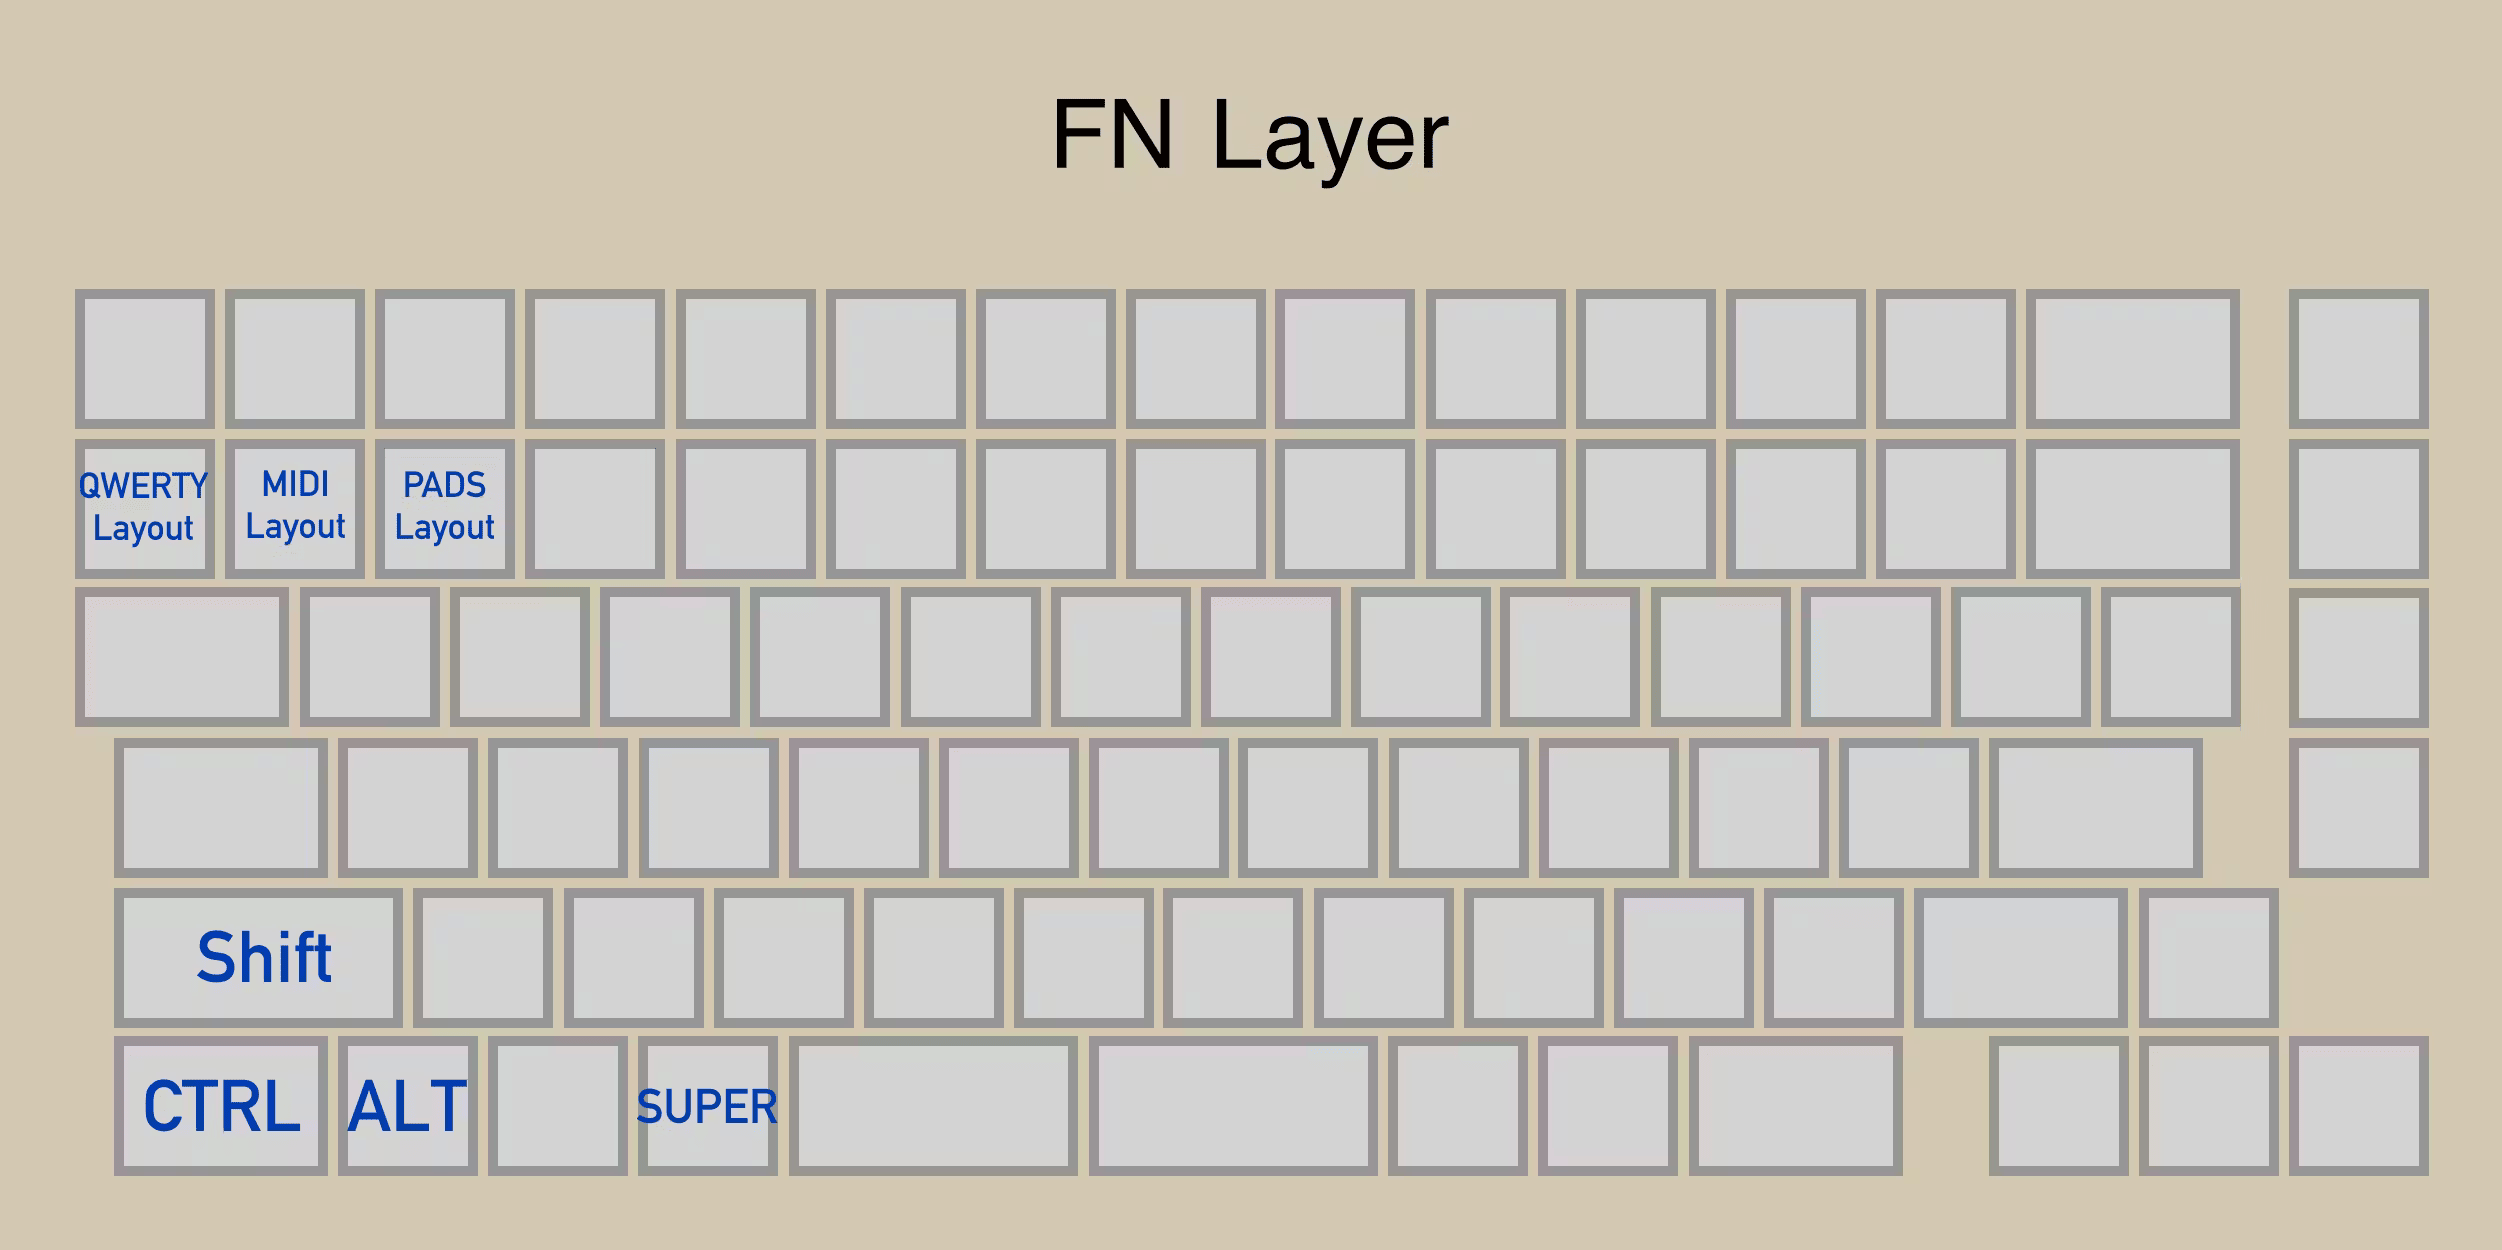
From here, use Fn + 1 for piano or ghoti, or Fn + 2 for drums. Hold Fn again to change instruments using the alternate shortcut. For the regular QWERTY layer, use Fn + Tilde after holding Fn to toggle the Function layer.
Understand Your controller

Notes in piano mode are laid out horizontally like a piano, while notes in ghoti mode are laid out vertically in half-chromatic steps.
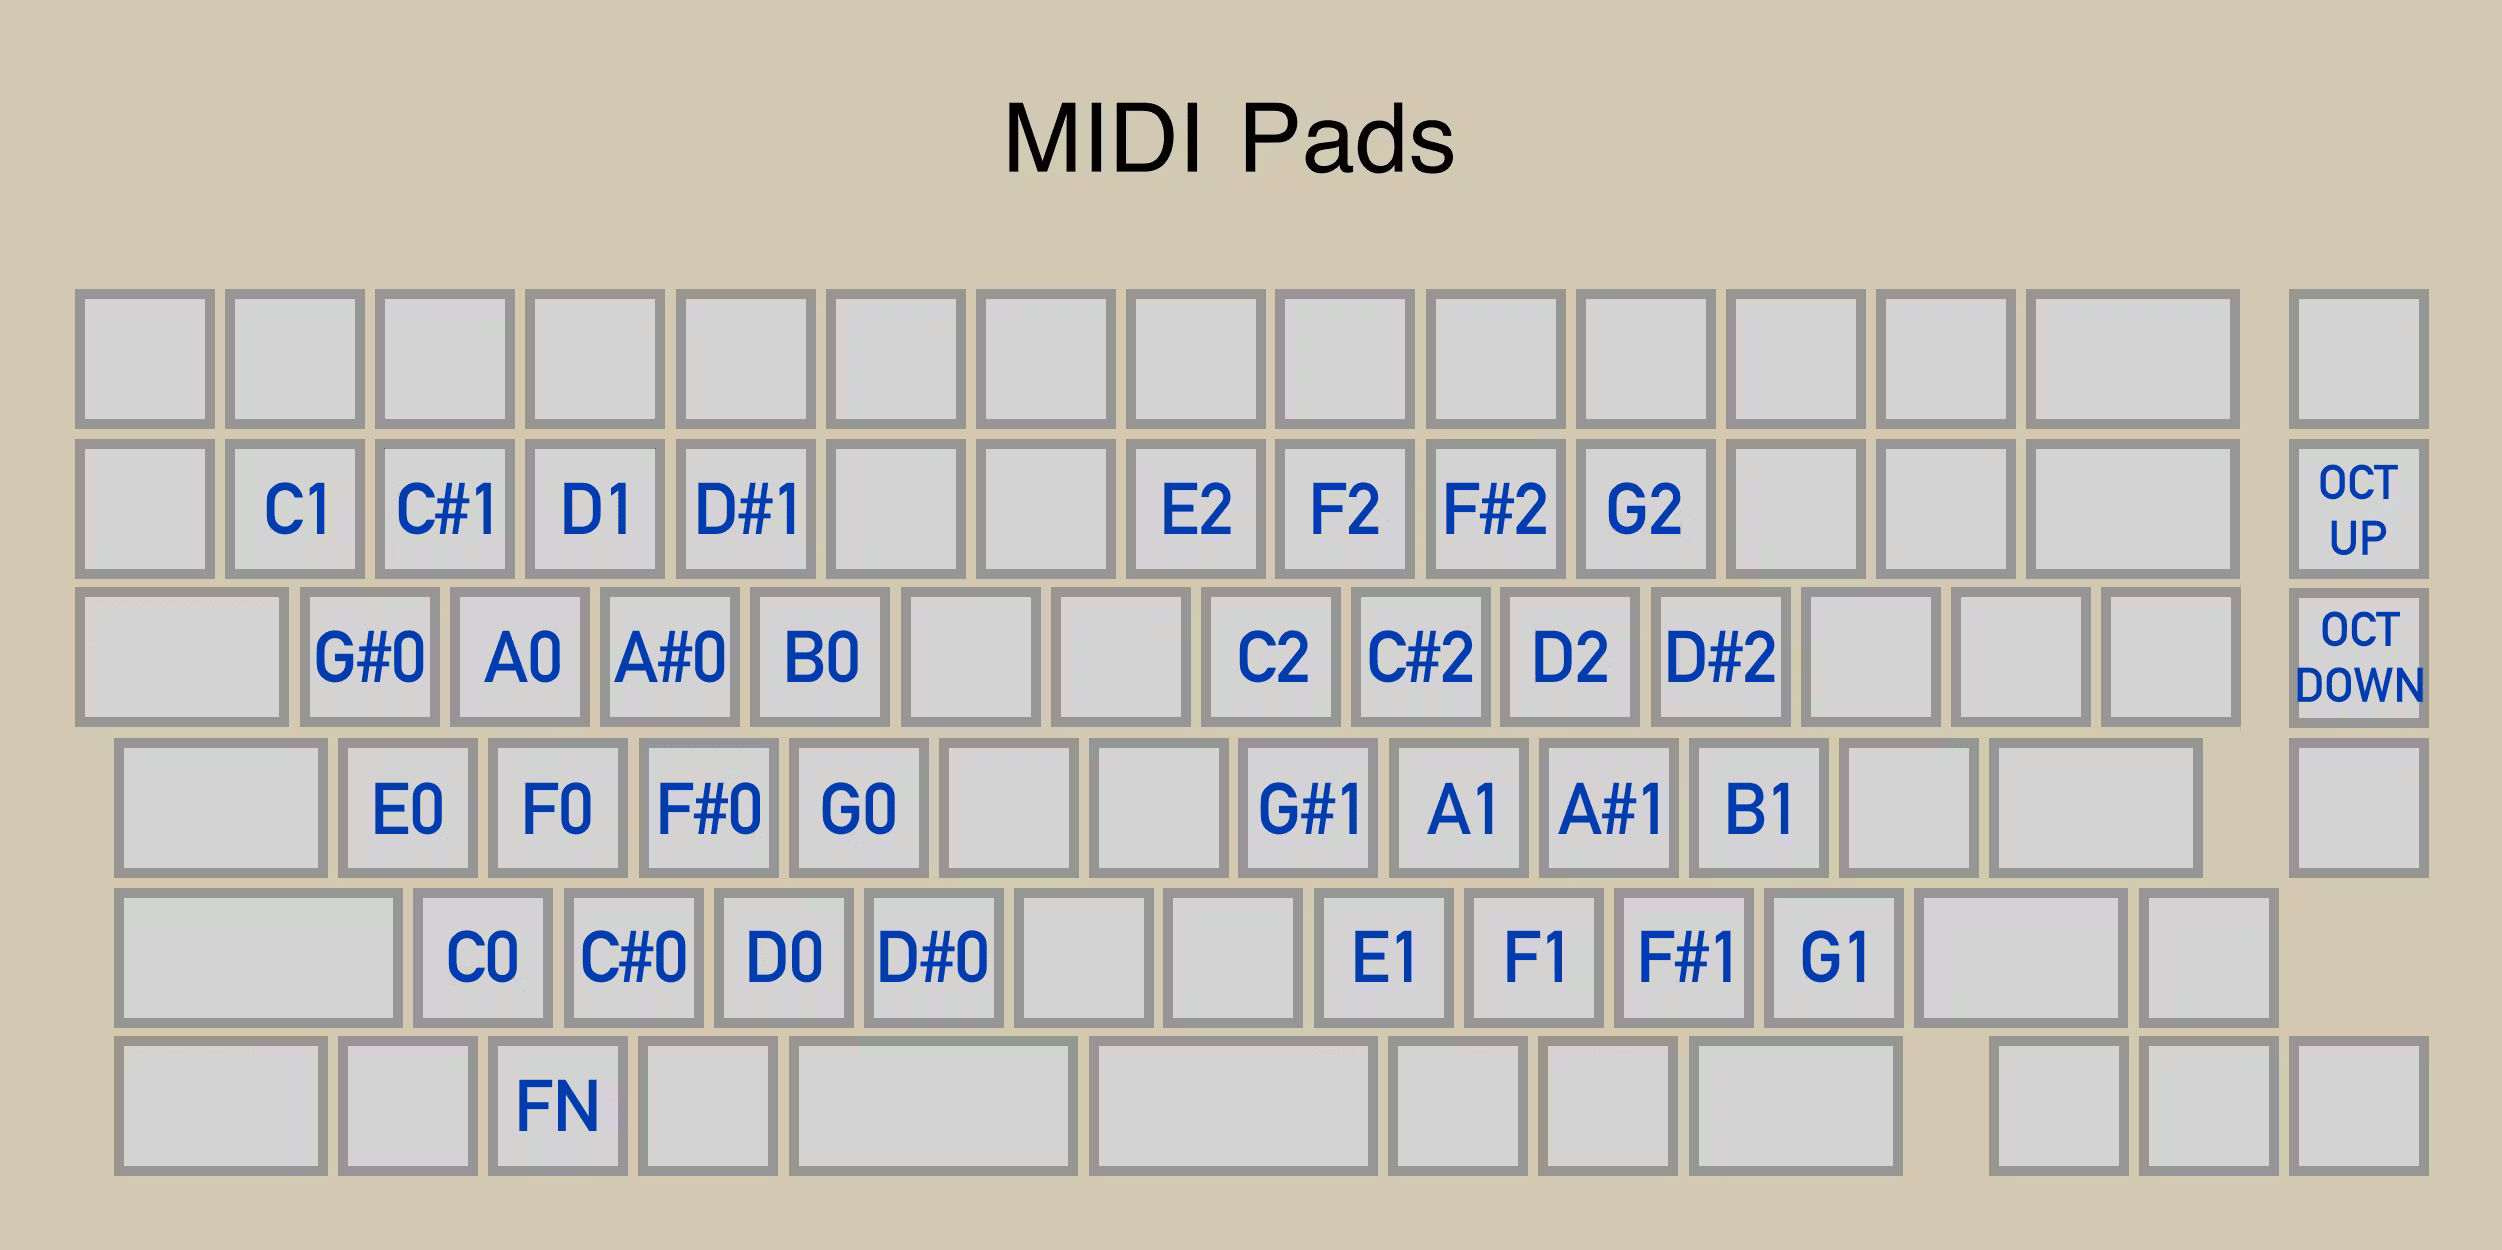
Drums are made up of 32 pads, laid out in 4x4 grids (two 16-block grids):
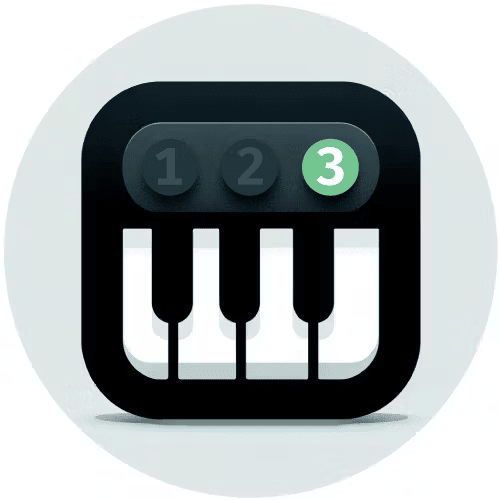
Lastly, the key function layer, where you can switch instruments:
Harmony
Open your DAW and select the Launch keyboard you used for this project. Play a fun tune. Groovy!