

Collect Materials
• LULZBOT TAZ 6 Open Source 3D printer (unboxing guide) • Recommended filament: nGen by ColorFabb • SD card • [ConceptoBots .stl files](https://assets.system76.com/downloads/conceptobots-stl.zip) (90 MB download) • Your computer with at least 4GB RAM
INSTALL CURA SOFTWARE
A. Install Cura LulzBot by downloading the AppImage from the LulzBot Website. B. Once the AppImage is downloaded, open a terminal and navigate to the Downloads directory: ``` cd ~/Downloads ``` C. Next, enter the following command to make the file executable: ``` sudo chmod +x ./Cura_LulzBot_Edition-4.13.1.AppImage ``` D. Enter your password when prompted and press 'Enter'. E. Double-click the AppImage file to launch the Cura software. F. Open Cura. G. Select your printer. H. Select the extruder. (single or double) I. Now get ready to start building your robot in Cura!
BUILD YOUR ROBOT IN CURA
Before you get started, download and unzip the .stl files above. These contain the ConceptoBot parts. You will also want to have your SD card handy to save your final robot build. A. In the top-center dropdown of Cura, select your material. (next to standard filter)
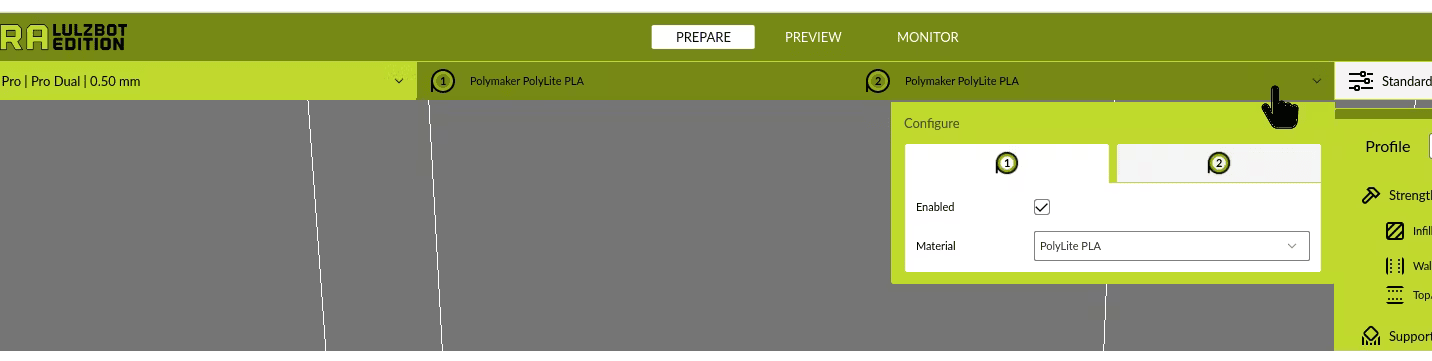
B. In the top-left corner, click the file icon button, and select the desired robot .stl files for the robot parts that you want to add to your print. *note: You can select multiple .stl files to load at once.* *tip: we recommend you “build” the robot as one print job. This saves time and also gives you an idea of what the final product will look like before your begin the print.* c. The images will load into Cura (it may take a moment or two to parse the files and load). Once loaded, Cura will automatically place them on the virtual printing bed so that there are no overlaps. Feel free to move them around on the bed by using the mouse. Save your robot design.

D. When you are satisfied with the layout, be sure your SD card is inserted and click SLICE in the bottom-right corner. E. Once the slicing is complete, choose ‘Save to Disk’ in the bottom-right corner. This will save the Gcode to the SD card. *note: using an SD card eliminates the need for a direct connection to the computer. We like fewer wires but you can choose whichever suits your needs!* F. Safely remove the SD card from the computer.
Print Your Robot
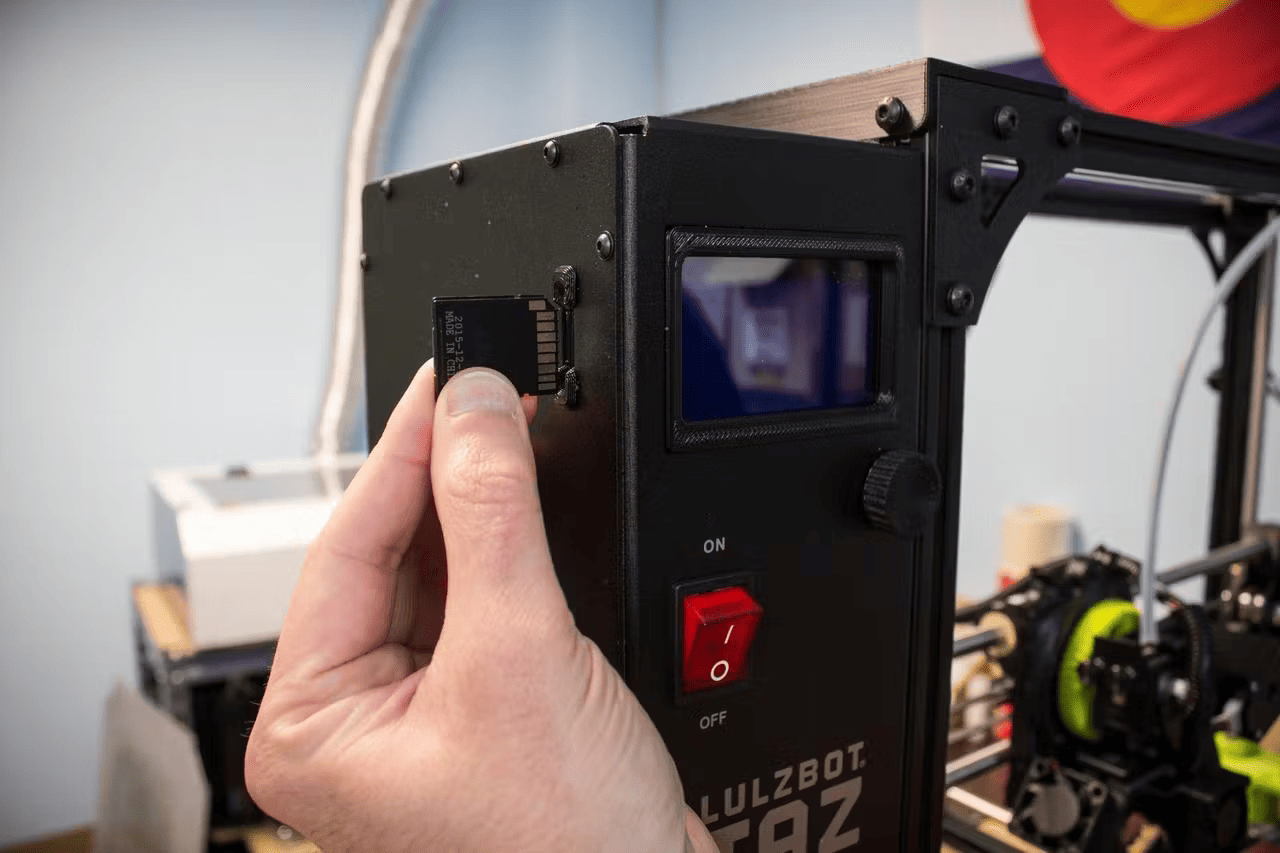
A. Insert the SD card into the LULZBOT TAZ 6.
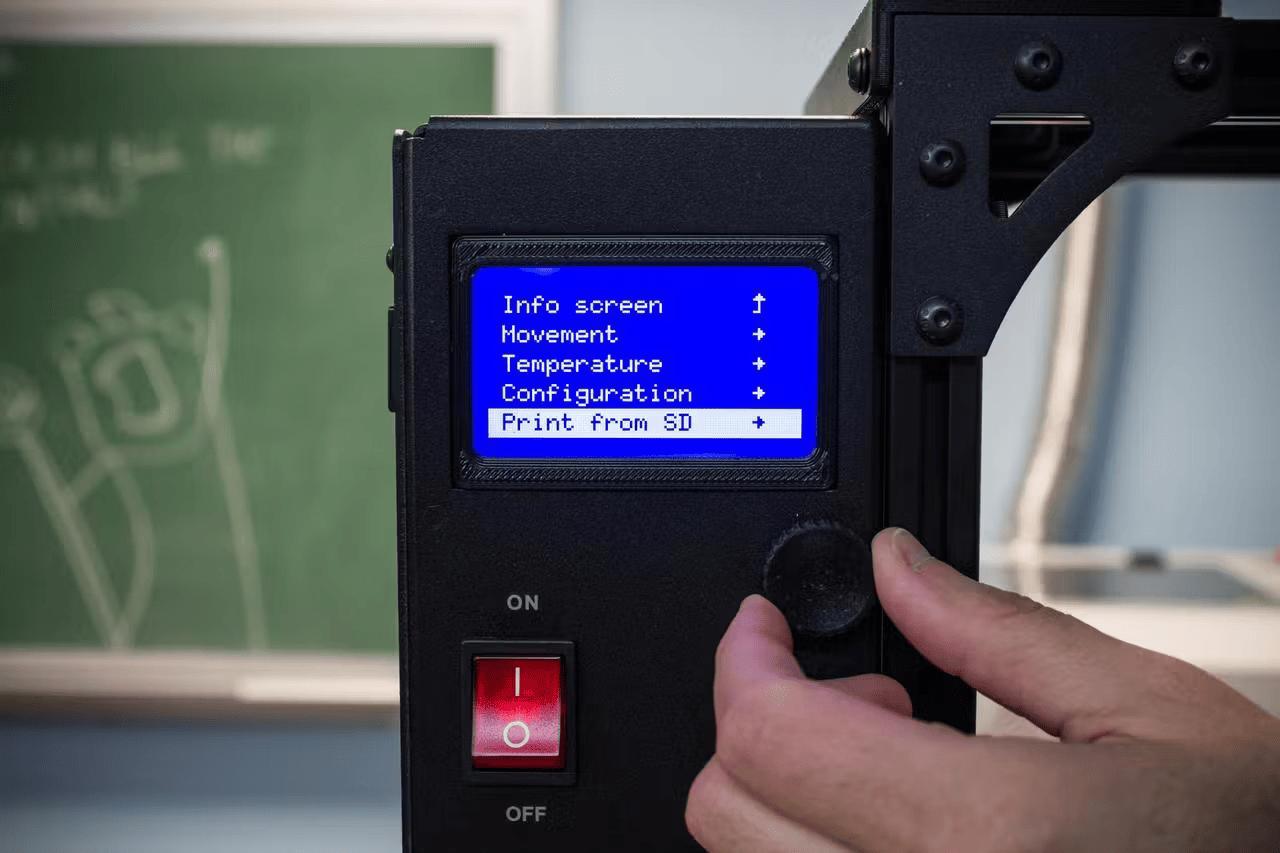
B. Turn the TAZ 6 on. C. Press on the dial to open the menu. D. Turn the dial to highlight "Temperature" and press to select. For the magnetic iron filament, turn dial to Temperature: 220, and press to select again. *note: If you already set your filament in Cura, you can skip this step.* E. Turn dial to highlight "Nozzle", then press to select. F. Turn button to Nozzle: 60, press dial. *note: If you already set your filament in Cura, you can skip this step.* F. Turn button to "Main", and select "Print from SD card". Press on the dial, and the TAZ 6 will begin printing!
Assemble Your 3d Printed Parts
A. Lift off the printer.
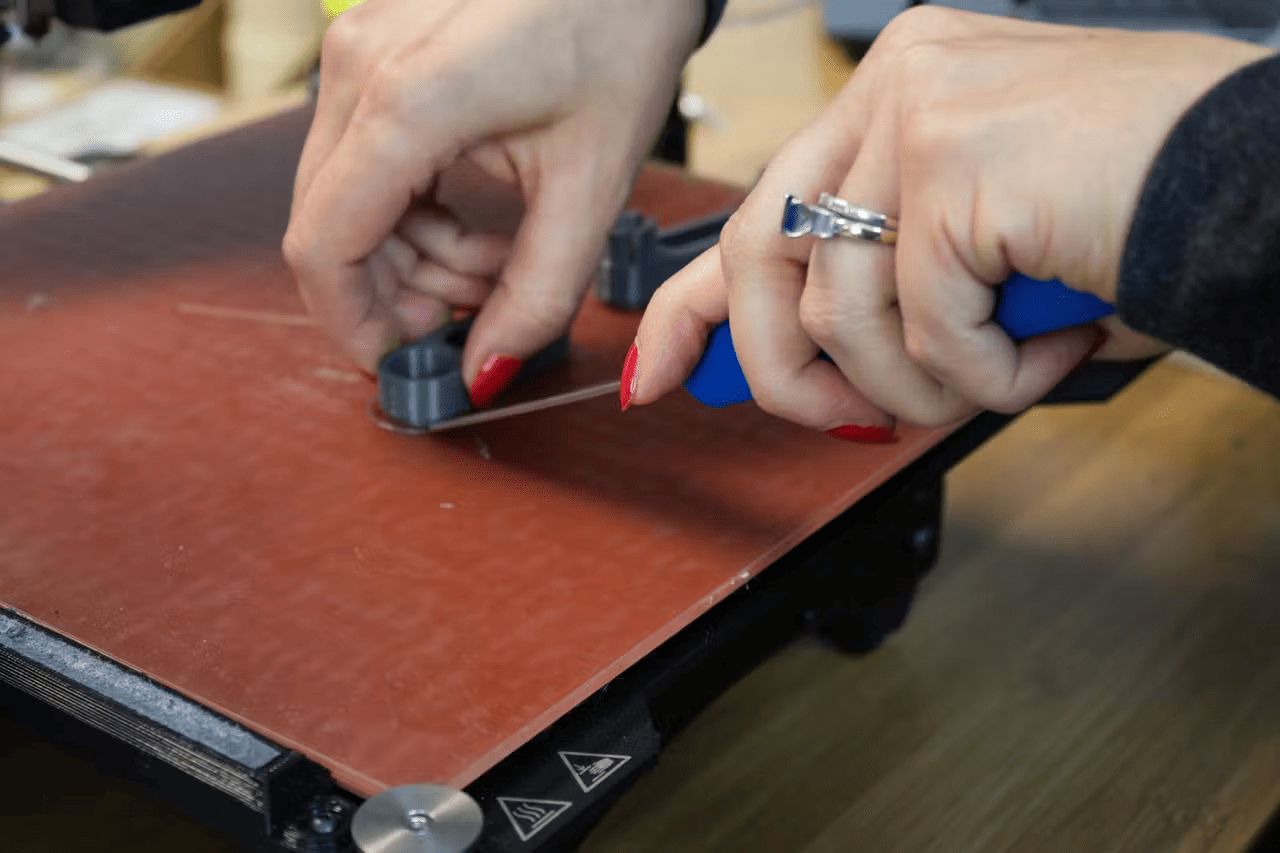
B. Separate the piece from loose strands of filament. C. File rough edges. D. Piece together as you see fit. E. Marvel at your creation and pat yourself on the back!
Notes and Resources
This guide was for getting you started. Now you understand how to model, design and build your own robot toy! You've also learned how to print different connectors for robot parts that allow the joints to move. Get creative with each pre-created part to invent new uses for these parts. How you might take a 3D toy to the next level? For example, connect wires to build a robot that detects your heart rate, or a Raspberry Pi to make your robot move. Huge thanks to all the online resources we used for this article. There's lots of great information in many of them. Please visit them to learn more. *Aleph Objects* Thanks to Aleph Objects for partnering with us on this project and making 3D printing a learning adventure for the kids. Here are some great online resources that we found helpful — with helpful photos too! - [Unboxing your new Taz 6 printer](http://download.lulzbot.com/TAZ/6.02/documentation/guide/PDFs_for_web/TAZ_6_QSG_Unboxing_WEB.pdf) - [Operation Guide to set up your first 3D print](http://download.lulzbot.com/TAZ/6.02/documentation/guide/PDFs_for_web/TAZ_6_QSG_OPERATION_WEB.pdf) - [Taz 6 User Manual](http://download.lulzbot.com/TAZ/6.02/documentation/manual/9780989378482_interior_r6.02.pdf) (scaling your 3d model, pausing prints, troubleshooting + neat tips) *VagueEntertainment* Inspired by System76 Roguebots, Ben from VagueEntertainment built 3D animations and 3D-printed versions of the RogueBots characters. We just had to fly him out here to help bring ConceptoBots to life for the kids!