
Reboots (Unexpected)
If your system is spontaneously rebooting, this article provides steps to isolate the cause.
NOTE: There is a subtle but important difference between a reboot and a shutdown/power-off. In a reboot, parts of the system are left powered on to facilitate restarting the system. In a shutdown/power-off, hardware from all parts of the system except charging circuitry and capacitors is powered down.
Troubleshooting (Device Agnostic)
Section titled “Troubleshooting (Device Agnostic)”Software Causes
Section titled “Software Causes”Anything not directly affected by hardware is controlled by software. This includes the kernel, drivers, and desktop environment. The Operating System (OS), is essentially a software program that controls other software programs.
If anything running in software causes a large enough cascade effect, it can take the rest of the system down and cause reboots or shut-offs.
Software factors that can cause spontaneous reboots or crashes, include but are not limited to:
- Kernel Panics
- Kernel or Desktop Process Crashes
- Application Memory Leaks
- Driver Errors
- User Configuration Error
- Corrupted Operating System Files
Possible Solutions
Section titled “Possible Solutions”Check for Memory Leaks
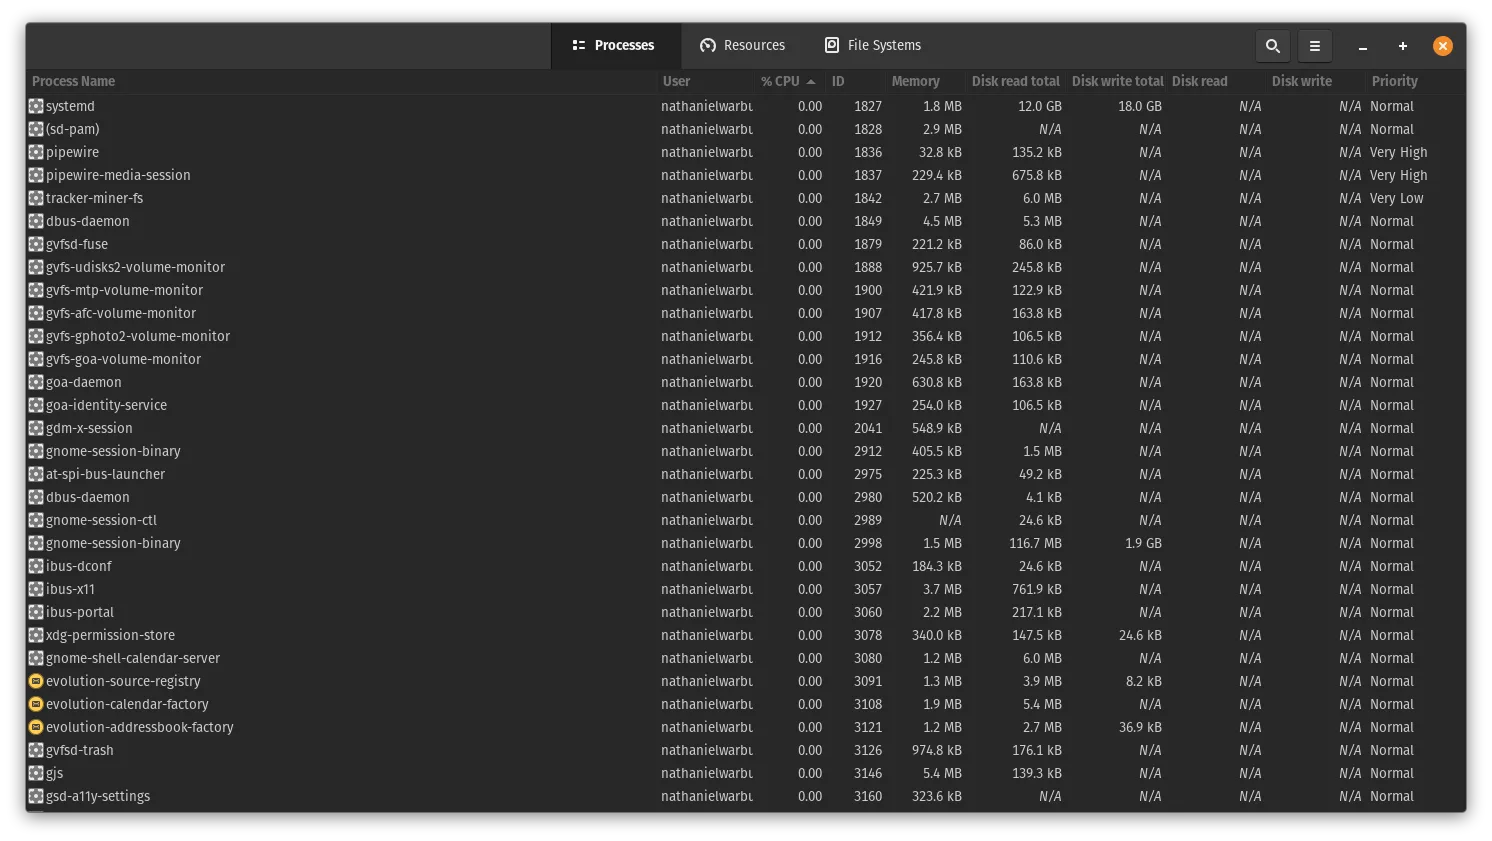
Section titled “Check for Memory Leaks”If an app is taking more than its fair share of system memory, that can have a runaway effect resulting in shutdowns or restarts.
Applications are available to help diagnose memory leaks.
From the Terminal run the top command to see which processes are using the most system resources:
Open a Terminal with SUPER+T (Pop!_OS) or CTRL+ALT+T (Ubuntu) run the following commands:
topIf a GUI tool is preferred, and you are running Pop!_OS or Ubuntu, open “System Monitor”:
Remove or Reinstall Drivers
Section titled “Remove or Reinstall Drivers”If a package is misbehaving or corrupted, try reinstalling it or removing it. This can be done with the following Terminal commands.
NOTE: replace [packagename] with the same of the application or driver you are are trying to reinstall. Do not include the “[ ]” around the name.
sudo apt updatesudo apt install --reinstall [packagename]To more completely remove the package:
sudo apt updatesudo apt remove [packagename]sudo apt cleansudo apt autoremoveFor more information, check out our Package Management Pop!_OS Article or the Ubuntu Equivalent
Test Admin User
Section titled “Test Admin User”Sometimes, an intentional or unintentional change to system configuration files can cause unexpected boot behavior, and is only limited to the user that made the changes.
To test whether the problem exists at a user-level or system-level, create a test administrator account and see if the reboots or shutdowns occur there.
For more information, visit our User Management Article
Upgrade or Reinstall OS
Section titled “Upgrade or Reinstall OS”Sometimes, a problem is endemic enough that it warrants a new OS version or a clean reinstall of the OS. We have several help articles that go over this process:
-
Back up your personal files using the steps here
-
Upgrade the Current OS:
Instructions for Upgrading PopOS Instructions for Upgrading Ubuntu
-
Boot from a Live Disk for Clean Install:
Make a Live Disk
-
Access the BIOS/Boot Menu
-
Reinstall the OS:
RAM Issues
Section titled “RAM Issues”The first step in the boot process is to assess the available hardware and load required resources into memory.
If your system is not POSTing (Power On Self Test), typically you’ll get symptoms like the following:
-
The system powers on, but nothing loads.
-
The system gets to a splash screen/logo, but crashes shortly afterwards.
It may reach a login screen or desktop, but the system is unstable.
This usually indicates an issue with RAM (Random Access Memory). Despite the name, the system tends to use similar areas of RAM when booting (for example, the RAM module in Slot 1 is accessed first). The earlier in the boot process the system hits bad sectors of RAM, the sooner the system will freeze or reboot.
If the system is booting to a desktop, the first troubleshooting step is to run stress tests on the memory. If the stress test completes, it will show error messages for your RAM. If the test doesn’t complete it will likely trigger the issue, and indicate that RAM is to blame.
To Test RAM
Section titled “To Test RAM”The application Memtester can be used to scan the RAM sticks for bad sectors. Memtester can be run from your booted OS, or from a Live Environment. This can be a Live USB, or the Recovery Partition
-
Install Memtester
Open a
Terminalwith SUPER+T (Pop!_OS) or CTRL+ALT+T (Ubuntu) run the following commands:Terminal window sudo apt updatesudo apt install memtesterThe first command will make sure your package lists are up to date. The second will install the application memtester.
-
Once memtester is installed, instruct it to test most of the RAM, leaving enough for the OS to continue running.
For example, if your system has 16GB of RAM, test 12GB or 14GB.
To start the test, run these
Terminalcommands:Terminal window sudo memtester 12GB 3 > ~/memtester.txt
This command will run memtester and test 12GB of RAM 3 times, then save the output to a file called “memtester.txt” in your Home folder.
IMPORTANT NOTE: Close all applications other than Terminal when you run memtester. This will likely take a few hours (the application runs multiple passes over the memory) so it would be best to run it overnight.
Thermals
Section titled “Thermals”Modern hardware is designed to shut systems down when they reach temperatures that may be damaging to the internal components. Typically, these thresholds are in the upper 80s or 90s Celsius, depending on hardware.
If your system is spontaneously shutting down, this may be caused by overheating. Systems with dedicated GPUs tend to run hot under normal circumstances, so noticing an overheating problem can be challenging from ambient temperature alone.
The temperatures of your CPU cores and GPU card can be checked through software.
Run lm-sensors
Section titled “Run lm-sensors”lm-sensors (installed by default on Pop!_OS) is a text-based tool that runs in a Terminal.
-
Install
lm-sensors(If not installed)Open a
Terminalwith SUPER+T (Pop!_OS) or CTRL+ALT+T (Ubuntu) run the following commands:Terminal window sudo apt updatesudo apt install lm-sensors -
Get Sensor Output
Terminal window sensors
This command will generate output like this:
coretemp-isa-0000Adapter: ISA adapterPackage id 0:  +55.0°C  (high = +100.0°C, crit = +100.0°C)Core 0:        +53.0°C  (high = +100.0°C, crit = +100.0°C)Core 1:        +53.0°C  (high = +100.0°C, crit = +100.0°C)Core 2:        +53.0°C  (high = +100.0°C, crit = +100.0°C)Core 3:        +53.0°C  (high = +100.0°C, crit = +100.0°C)Core 4:        +55.0°C  (high = +100.0°C, crit = +100.0°C)Core 5:        +53.0°C  (high = +100.0°C, crit = +100.0°C)Core 6:        +52.0°C  (high = +100.0°C, crit = +100.0°C)Core 7:        +54.0°C  (high = +100.0°C, crit = +100.0°C)
system76_acpi-acpi-0Adapter: ACPI interfaceCPU fan:        0 RPMGPU fan:        0 RPMCPU temp:     +55.0°CGPU temp:     +54.0°C
iwlwifi_1-virtual-0Adapter: Virtual devicetemp1:        +69.0°C
pch_cometlake-virtual-0Adapter: Virtual devicetemp1:        +60.0°C
BAT0-acpi-0Adapter: ACPI interfacein0:          12.95 Vcurr1:         0.00 A
Psensor
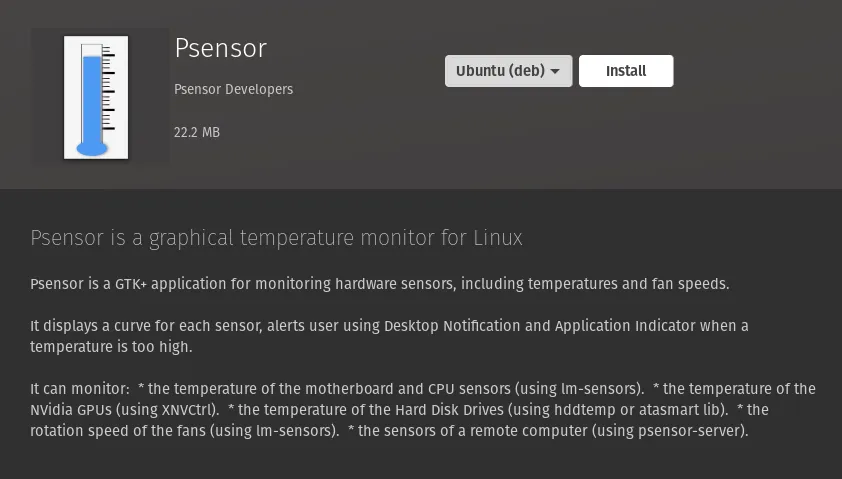
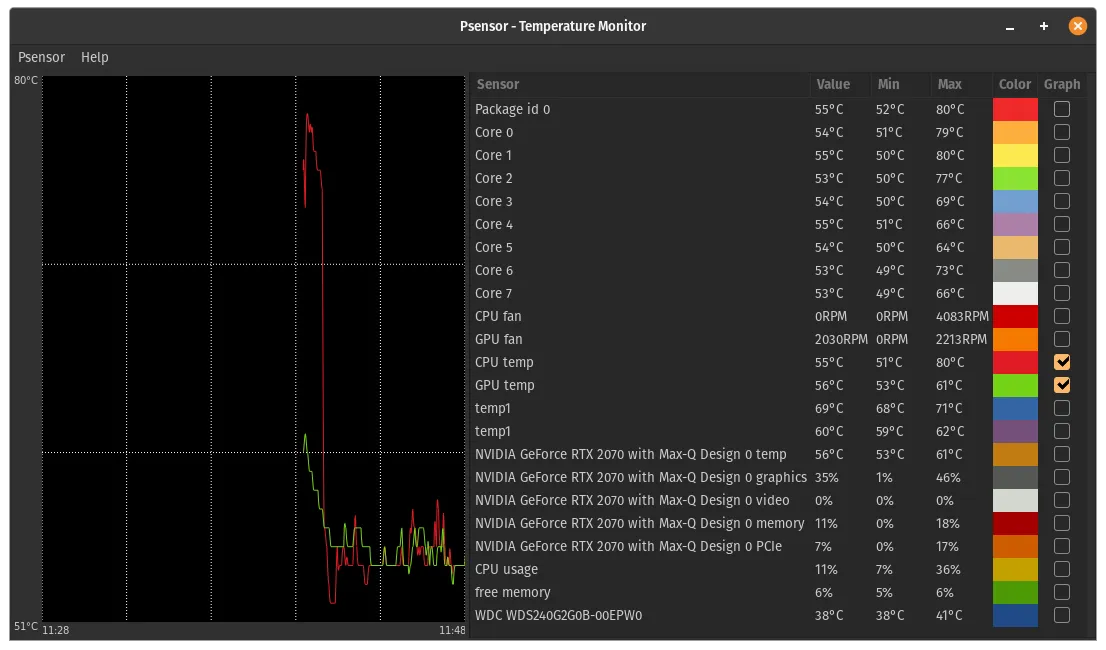
Section titled “Psensor”If you prefer a GUI tool which provides graphing over time, the application Psensor can be installed from the Pop!_Shop, or through the Terminal with this command:
-
Install (
Terminal):Terminal window sudo apt install psensor -
Install Through Pop!_Shop
-
Run Psensor:
In a
Terminalrun:Terminal window psensor
Or, to launch through the OS interface, click on “Activities” in the top-left (Pop!_OS 20.04 LTS, or Ubuntu), or “Applications” (Pop!_OS COSMIC) and search for “Psensor”
High Temperatures
Section titled “High Temperatures”If the system temperatures are abnormally high, the fans may need replaced, and/or the thermal compound may need re-applied to the CPU and GPU cores.
Specific instructions for working on your hardware model can be found here
Quotes for replacement fans and thermal paste can be generated on open support tickets. To open a support ticket, visit this link
Drive Issues
Section titled “Drive Issues”When programs and files are not being stored in RAM, they are stored on the drive. Similar issues can occur with a failing hard drive as with memory; If there’s a read/write issue, or electrical interference, this can cause unexpected shutdowns.
Different drive types have different specifications and write or transfer data at different speeds. They also have different power requirements, and communicate with mainboards through different ports.
M.2 Drives
Section titled “M.2 Drives”There are two types of M.2 style drives that ship in System76 machines. M.2 SATA, and NVMe. Both use M.2 ports on the mainboard, but each have different transfer speeds, power profiles, and connection protocols.
| NVMe Drives | M.2 SATA Drives |
|---|---|
| Faster I/O | Slower I/O than NVMe |
| More power consumption | Less power consumption |
| Uses more I/O resources | Uses fewer I/O resources |
2.5” SATA Drives
Section titled “2.5” SATA Drives”2.5” SATA drives all use the same form factor, but their internals and power consumption differ whether they are solid state, or RPM (“spinning rust”) drives.
The number and age of these drives installed in a system can have an impact on power consumption, or boot/reboot behavior. Boot behavior can be affected especially if there are operating systems installed on the drives, and the boot configurations of those operating systems has been corrupted, or if the drives themselves are failing.
A failing drive can do more than cause issues loading things, or when booting. Depending on how the hardware is interacting with the mainboard, it can cause electrical or performance issues for the system as a whole.
Troubleshooting
Section titled “Troubleshooting”To troubleshoot drive hardware issues, try booting to a different drive or to the BIOS with some or all of the drives removed.
Try booting with the drives in different drive slots/bays.
Check the drive(s) for errors from a live disk, as outlined here: [Diagnose Hardware]
Laptop Specific Troubleshooting
Section titled “Laptop Specific Troubleshooting”There are several reasons why a laptop may spontaneously reboot. Typically it has to do with a thermal or power delivery issue, but it can also be caused by faults in the memory modules or errors with the drive. RAM and disk problems are more likely to cause a spontaneous reboot. Thermals or power delivery-issues are more likely to cause spontaneous shut-offs.
Power Delivery
Section titled “Power Delivery”On System76 laptops, the charging circuitry, and power circuitry are partially independent from each other. The system will power on and function normally with the battery removed. This means that a spontaneous power-off could be caused by either a problem with the AC Adapter, or the Battery.
Battery
Section titled “Battery”As lithium-ion batteries age, their ability to hold a charge, and accurately report charging estimates deteriorates.
For example, the OS may be reporting that the laptop has enough charge to stay on for another hour, but in reality the battery may fully discharge in 15 minutes. This situation can lead to spontaneous shutoffs that do not immediately appear to be battery related.
Battery Statistics
Section titled “Battery Statistics”Battery statistics can be retrieved using the following Terminal command:
upower -dThat will generate output like this:
Device: /org/freedesktop/UPower/devices/line_power_AC  native-path:          AC  power supply:         yes  updated:              Wed 11 Aug 2021 10:13:38 AM MDT (6762 seconds ago)  has history:          no  has statistics:       no  line-power    warning-level:       none    online:              yes    icon-name:          'ac-adapter-symbolic'
Device: /org/freedesktop/UPower/devices/battery_BAT0  native-path:          BAT0  vendor:               Notebook  model:                BAT  serial:               0001  power supply:         yes  updated:              Wed 11 Aug 2021 12:05:38 PM MDT (42 seconds ago)  has history:          yes  has statistics:       yes  battery    present:             yes    rechargeable:        yes    state:               fully-charged    warning-level:       none    energy:              69.54 Wh    energy-empty:        0 Wh    energy-full:         70.1784 Wh    energy-full-design:  70.68 Wh    energy-rate:         25.6956 W    voltage:             12.953 V    percentage:          99%    capacity:            99.2903%    technology:          lithium-ion    icon-name:          'battery-full-charged-symbolic'
Device: /org/freedesktop/UPower/devices/DisplayDevice  power supply:         yes  updated:              Wed 11 Aug 2021 10:33:38 AM MDT (5562 seconds ago)  has history:          no  has statistics:       no  battery    present:             yes    state:               fully-charged    warning-level:       none    energy:              69.54 Wh    energy-full:         70.1784 Wh    energy-rate:         25.6956 W    percentage:          99%    icon-name:          'battery-full-charged-symbolic'
Daemon:  daemon-version:  0.99.11  on-battery:      no  lid-is-closed:   no  lid-is-present:  yes  critical-action: HybridSleep
Specific sections to pay attention to are capacity, energy-full, and energy-full-design. These indicate how well the battery is aging, and assessing it’s own charging capabilities.
energy-full: 70.1784 Wh energy-full-design: 70.68 Whenergy-full should never be higher than energy-full-design. If it is, that indicates a problem with the integrated chip on the battery, and may be why charging reports are incorrect, and why, by extension, the system is shutting off unexpectedly.
capacity is a good way to gauge the age and health of the battery. If capacity is 70% or lower, the battery is showing aging, and won’t hold as much charge as it did when new.
NOTE: This number will gradually decrease over time from ~100% to 0%. Having a capacity of 95% and steadily decreasing as the battery gets older is expected behavior. Sudden drops in capacity, however, can indicate hardware failure.
AC Adapter
Section titled “AC Adapter”There are four (4) main components that can be the cause of spontaneous shut-offs related to the AC Adapter:
- The cable from the wall outlet to the PSU/“brick”.
- The PSU/“brick” and the DC cable to the laptop.
- DC-In Port on the laptop.
- Charging circuitry on the mainboard.
Stress to the cabling, or short-circuits on components 1 or 2 can cause shut-offs. If the cable is moved while connected and the damaged part of the cable shifts enough, current into the laptop is interrupted. If the battery is removed, or no longer holding a charge, this interruption can cause the system to power down.
Removing the battery, connecting the AC adapter and moving or rotating the cable components one section at a time can reveal which part of the cabling may need replaced.
If moving the plug in the DC-In port on the laptop specifically causes the issue, it’s more likely that the DC-In port needs replaced or re-soldered onto the board.
Both the DC-In port and issues with the mainboard charging circuitry require systems to be brought in for repairs. To open a support ticket, visit: this link
Desktop Specific Troubleshooting
Section titled “Desktop Specific Troubleshooting”The main difference in troubleshooting desktop reboots vs. laptop reboots are the battery, and greater disassembly options (i.e. more parts to troubleshoot). With a desktop computer (excepting the Meerkat), the power delivery system consists of the PSU, and the cable from the PSU to the wall. Unless a battery backup is added via an Uninterrupted Power Supply (UPS) an issue in the power delivery system will shut the system off.
Unlike most laptops, the GPU card can be removed or re-seated in desktop computers which can help with boot and screen rendering issues.
Thelios include a SATA passthrough device called the Thelio I/O board. If that passthrough device, the SATA cables or any of the drives connected through them are having issues this can cause booting/rebooting issues.
On the Meerkats, the Power Supply consists of a power cable similar to a laptop with a wall plug, “brick” and DC-In plug.
Locate Service Manuals for your Desktop here
Power Supply Unit (PSU)
Section titled “Power Supply Unit (PSU)”On most of the Thelio configurations there is some room for changes in power delivery. However, on some larger models like the Thelio Mega, Major or Massive, the GPUs and PSUs draw a greater amount of wattage.
Factors that may influence reboots/power-offs:
- Thelio is connected to a UPS instead of directly to the wall.
- Thelio is connected to the wall, but the outlet is on a circuit with other, large home appliances.
- Faulty or disconnected wiring in the cable from the wall to the Thelio PSU.
- Failing PSU inside the Thelio.
- Faulty or disconnected internal cabling between the PSU and the rest of the Thelio components.
If any of the above factors disconnect power, or reduce overall power reaching the Thelio, the system may reboot or shut off.