

Printer Setup (Pop!_OS)
Most printers will be automatically added to the computer. If a printer is not automatically added, users can manually add printers in the Settings -> Printers menu.
-
Press the Super key and type the word Printers.
-
Choose the
Printersresult in the search box. -
In the
Printerssettings panel, click theAdd a Printer...button to search for locally connected printers.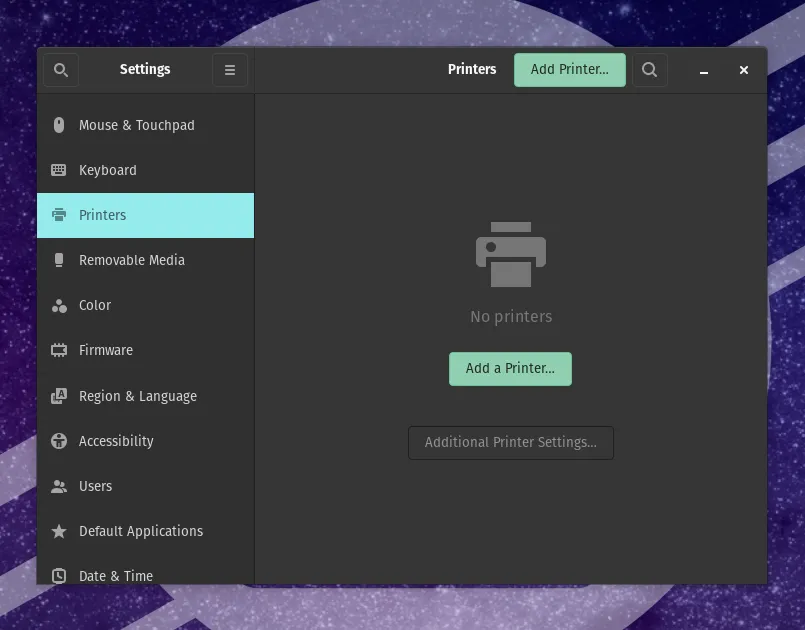
-
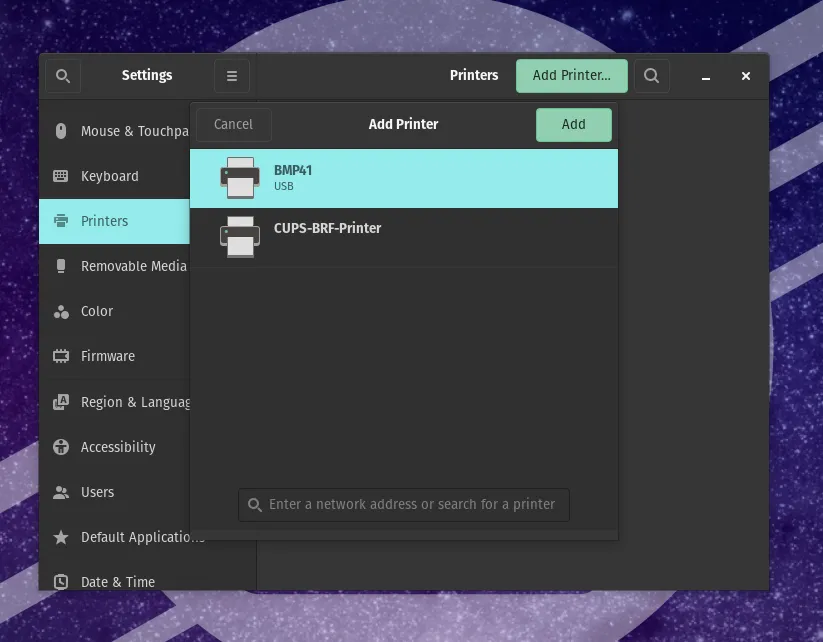
Wait a few seconds for printers to appear in the Device List.
-
Select the correct printer and click
Add.
Checking Printer Status in CUPS
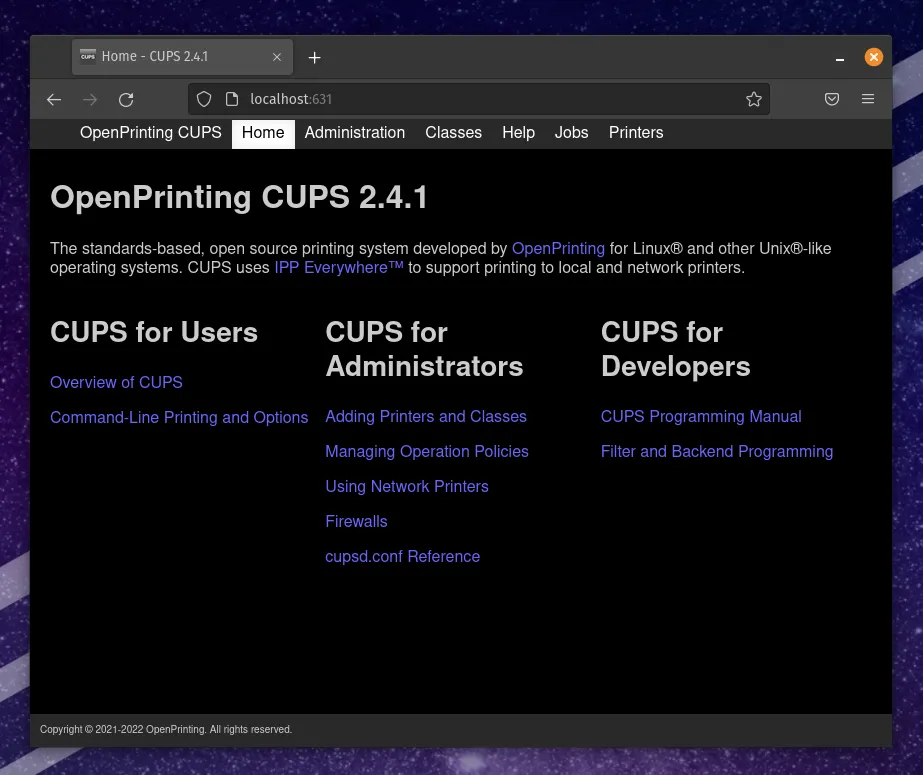
Section titled “Checking Printer Status in CUPS”CUPS can be managed directly using a web browser by navigating to the following local URL:
The status window will show current print jobs, detected printers, and other information about the printing system.
Adding Users to the lpadmin Group
Section titled “Adding Users to the lpadmin Group”CUPS allows you to manage printers using Terminal commands. A user must be a part of the lpadmin group to use these commands. You can confirm you are a part of this group with the following command:
groupsYou can add yourself to this group using the below command:
sudo usermod -aG lpadmin $USERIf you prefer to manage printers in Terminal, See the CUPS documentation for full documentation.
Sharing a Printer to the Local Network
Section titled “Sharing a Printer to the Local Network”Share a printer with the local network by clicking the Administration tab.
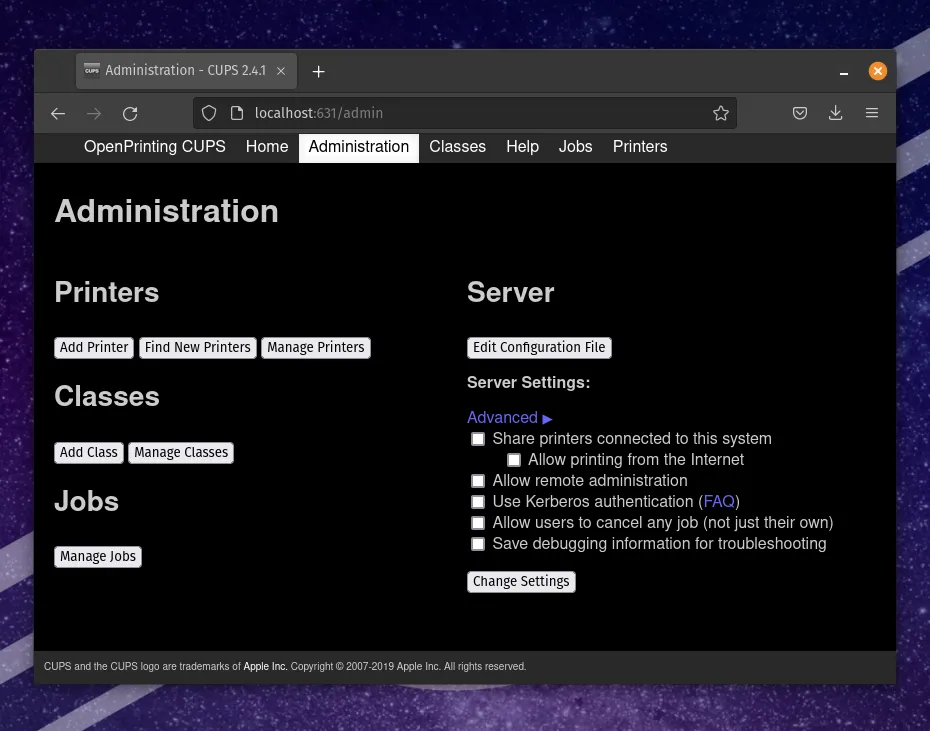
Check the box for Share printers connected to this system.
Locally shared printers are visible in the Printers tab in the Settings application. Users with the appropriate group assignments can now select the printer and enter their username and password to gain access to the network printer. If a user is unable to see the printer, see the above section to confirm the user is in the lpadmin group, and to add the user to the group.
HP Printers
Section titled “HP Printers”HP printers are supported with the hplip package, which is installed by default in Pop!_OS
sudo apt install hplipHP Device Manager (GUI)
Section titled “HP Device Manager (GUI)”If you would like to use a guided GUI application from HP, you will need to install a python dependency:
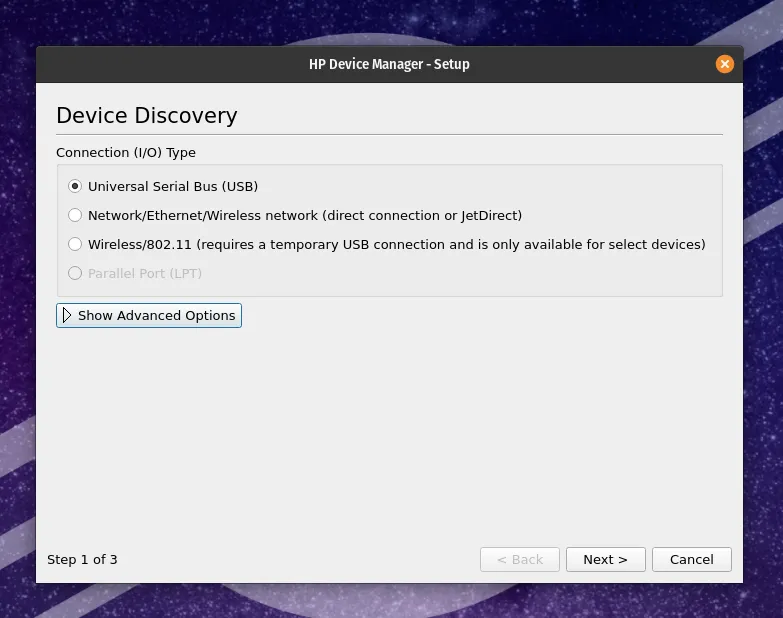
sudo apt install python3-pyqt5Then run hp-setup to start the HP Device Manager.
Epson Printers
Section titled “Epson Printers”Epson printer drivers are in the printer-driver-escpr package which is also installed by default. You may need to install the lsb package for some printer versions:
sudo apt install lsb printer-driver-escprAdditional configuration will require that the user is a part of the lpadmin group. See the above section for instructions to confirm or add a user to this group.
Brother Printers
Section titled “Brother Printers”Brother provides a driver installation tool for Linux users. Install the appropriate driver for your Brother printer by downloading this tool and running the installer with your printer model appended to the command.
-
Click this link to search for the appropriate printer.
-
Once you’ve located your printer, select
Linux (deb)for your “OS Version”, then clickOK. -
Select the
Driver Install Toolat the top of the list. -
Click
Agree to the EULA and Download. -
Choose the
Save Fileoption if prompted. -
Press Super + T to launch the Terminal application.
-
Change directory to where you downloaded the driver (usually the Downloads directory). Unzip the file using this command:
cd Downloadsgunzip linux-brprinter-installer-*.gz -
Run the installer by typing the unzipped installer name into the terminal.
ℹ️ Your installer version may differ from this guide. Type the first portion of the installer name as shown below, and then hit
TABto complete the installer name. Substitute PRINTERNAME with your exact printer model name.During this installer process, answer
yesto all questions except when you are prompted for theDevice URI. See step 9 if you require a device URI for your printer setup.Terminal window sudo bash linux-brprinter-installer PRINTERNAME -
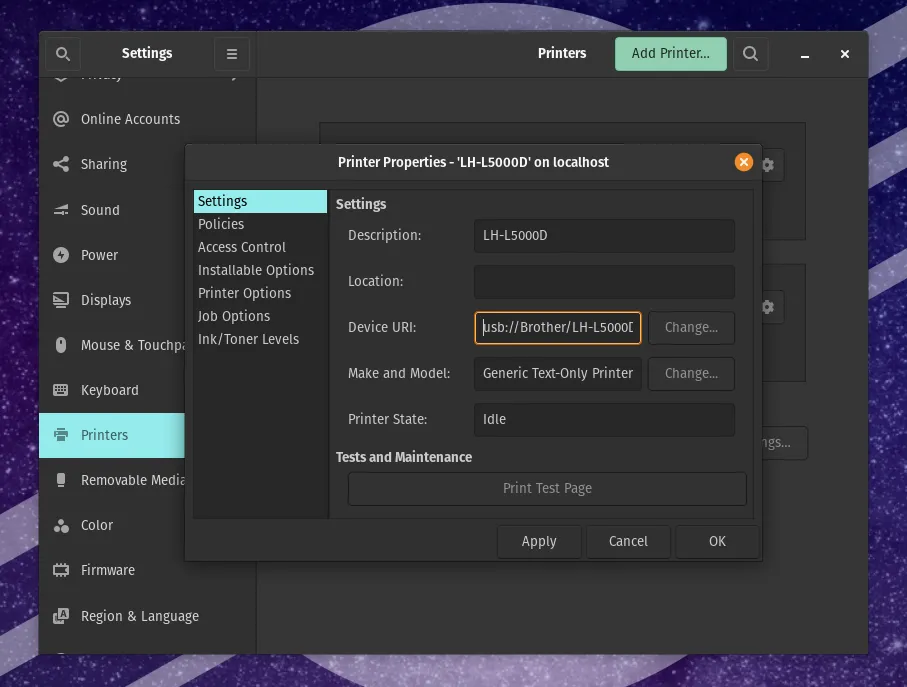
If your printer configuration requires a device URI, you can find that by opening up Settings > Printers > Additional Printer Settings, then right-click your printer and click
Properties. In the resulting window, you’ll be able to find your Device URI, as shown in the screenshot below.
Troubleshooting
Section titled “Troubleshooting”Remove and Re-add the Printer in Settings
Section titled “Remove and Re-add the Printer in Settings”If the printer stops working, open the Printers Application again and click the gear icon, and select Remove Printer to remove the printer and its settings. Repeat the steps above to add the printer and try printing the test page again. This process often resolves general printer connectivity issues.
Assign a Static IP Address to the Printer
Section titled “Assign a Static IP Address to the Printer”Connectivity issues can occur when the printer is assigned an address using DHCP. Assigning a permanent, static IP address will resolve these issues. Reference your printer manufacturer’s documentation for this process. Be aware that simply using the printer’s assigned DHCP address as a static IP may cause a future address conflict. Additional router configuration may be required to reserve specific addresses within or outside of a DHCP address pool. If your printer is being deployed on a corporate network, contact your network administrator for this process.
Useful Commands
Section titled “Useful Commands”Reinstall the CUPS print server to resolve general printing issues:
sudo apt install --reinstall cups cups-clientReinstall the system control panel in case printer settings are not available.
sudo apt install --reinstall system-config-printer