

Diagnose Hardware Failures
NOTE: If the System will not power on, skip to the end of this article.
If the system boots, but takes a long time to boot, crashes, or reports other random, hard to track down errors, then the individual hardware components can be checked for failure.
Memory
Section titled “Memory”We can test memory in your running OS with the ‘memtest’ package. You want to put most of your memory under test but still leave enough space for your normal workload and the OS to continue running. On a 8 GB system, testing 6 GB would be tested like this:
sudo apt install memtestersudo memtester 6G 5Memory test can take a number of hours. While this will not put all of memory under test, it will make any memory error likely to cause instability if not part of the tested memory or show up clearly with errors in the memtester run
Memtest86++ also has ISO downloads for personal use. You would boot from a USB drive made with the ISO. Right as memtest loads (blue screen), press F2 to enable multi-core mode. Wait at least 20 minutes for the tests to run, or until any errors are shown in red. If any errors are found, please run it again in single core mode, and let it run overnight to check for any memory errors. 6 to 8 passes are minimally recommended. If memory errors show up, the memory stick should be replaced.
Hard Drive
Section titled “Hard Drive”To check the hard drive for disk failures, start the program Disks, select the hard drive on the left, then click the icon in the top right, and choose SMART Data and Self-Tests, and then click Start Self-test and choose the Extended test. This test takes a few hours to run and will will give you a large amount of info about the health of the drive.
All of the values start at 100, and work their way down to 0. The terms “old-age” and “pre-fail” are normal. Pay attention to the overall assessment, and to how close the values are working towards the failure point, which is typically 0.
NVMe Drive
Section titled “NVMe Drive”NVMe drives can’t be checked with a SMART Test through the Disks application but the package smartmontools can be used for this. It can be installed with this command:
sudo apt install nvme-cli smartmontoolsFirst, let’s list the NVMe’s that are installed:
sudo nvme listUnder ‘Node’ you will see a mount path for each drive something like ‘/dev/nvme0n1’, to access the smart-log you would type in the following:
sudo smartctl -a /dev/nvme0n1Testing the CPU
Section titled “Testing the CPU”Using the stress-ng program
Section titled “Using the stress-ng program”Run this command to install stress-ng:
sudo apt -y install stress-ng s-tuiUsing the s-tui program
Section titled “Using the s-tui program”Now this command:
s-tuiFrom here use the Down to switch from Monitor to Stress by pressing the Enter. Now watch the CPU temperatures raise as the system’s CPU is tested.
Testing the GPU
Section titled “Testing the GPU”Benchmarking
Section titled “Benchmarking”We can confirm whether there is an issue with the GPU in your system by using a benchmarking tool called Unigine Heaven.
Click the ‘Free Download’ button and choose the Linux option in the dropdown. Once the download is complete, there should be a Unigine_Heaven-4.0.run file in the Downloads directory.
From a terminal, navigate to the folder with the Unigine Heaven download:
cd DownloadsRun the following command:
chmod +x Unigine_Heaven-4.0.runThen, the application can be extracted:
./Unigine_Heaven-4.0.runNext, let’s move to the new directory that was created:
cd Unigine_Heaven-4.0/Now, the application can be started:
./heavenClick the ‘Run’ button to begin the program.
GPU Burn (for NVIDIA GPU’s only)
Section titled “GPU Burn (for NVIDIA GPU’s only)”We can also test the GPU by using GPU Burn. First, ensure git and CUDA are installed with this command:
sudo apt install git nvidia-cuda-toolkitNext, clone the repository and enter its directory with these commands:
git clone https://github.com/wilicc/gpu-burn.gitcd gpu-burnNow we’ll compile it:
makeGCC Errors (Pop!_OS 22.04)
Section titled “GCC Errors (Pop!_OS 22.04)”On some versions of Pop!_OS and Ubuntu (including 22.04), the default version of GCC may fail to compile gpu-burn. Install a compatible version with this command:
sudo apt install g++-10Then, run make again, specifying which version of GCC to use:
make NVCCFLAGS='-ccbin /usr/bin/g++-10'Running GPU Burn Tests
Section titled “Running GPU Burn Tests”For NVIDIA RTX GPUs, run the test using Tensor cores like so (this example will run it for 3600 seconds/1 hour):
./gpu_burn -tc 3600For NVIDIA GTX GPUs, run the test using CUDA cores like so (this example will run it for 3600 seconds/1 hour):
./gpu_burn 3600Test CPU thermals
Section titled “Test CPU thermals”If the CPU fan is spinning erratically, or you are experiencing random shutdowns, this may be the result of a thermal issue. To investigate this, we’ll use tools that can display CPU temperatures.
Modern hardware is designed to shut systems down when they reach temperatures that may be damaging to the internal components. Typically, these thresholds are in the upper 80s or 90s Celsius, depending on hardware.
If your system is spontaneously shutting down, this may be caused by overheating. Systems with dedicated GPUs tend to run hot under normal circumstances, so noticing an overheating problem can be challenging from ambient temperature alone.
The temperatures of your CPU cores and GPU card can be checked through software.
Run lm-sensors (command line tool)
Section titled “Run lm-sensors (command line tool)”lm-sensors (installed by default on Pop!_OS) is a text-based tool that runs in a Terminal.
-
Install
lm-sensors(If not installed)Open a
Terminalwith SUPER+T (Pop!_OS) or CTRL+ALT+T (Ubuntu) run the following commands:Terminal window sudo apt updatesudo apt install lm-sensors -
Get Sensor Output
Terminal window sensors
This command will generate output like this:
coretemp-isa-0000Adapter: ISA adapterPackage id 0: +55.0°C (high = +100.0°C, crit = +100.0°C)Core 0: +53.0°C (high = +100.0°C, crit = +100.0°C)Core 1: +53.0°C (high = +100.0°C, crit = +100.0°C)Core 2: +53.0°C (high = +100.0°C, crit = +100.0°C)Core 3: +53.0°C (high = +100.0°C, crit = +100.0°C)Core 4: +55.0°C (high = +100.0°C, crit = +100.0°C)Core 5: +53.0°C (high = +100.0°C, crit = +100.0°C)Core 6: +52.0°C (high = +100.0°C, crit = +100.0°C)Core 7: +54.0°C (high = +100.0°C, crit = +100.0°C)system76_acpi-acpi-0Adapter: ACPI interfaceCPU fan: 0 RPMGPU fan: 0 RPMCPU temp: +55.0°CGPU temp: +54.0°Ciwlwifi_1-virtual-0Adapter: Virtual devicetemp1: +69.0°Cpch_cometlake-virtual-0Adapter: Virtual devicetemp1: +60.0°CBAT0-acpi-0Adapter: ACPI interfacein0: 12.95 Vcurr1: 0.00 APsensor (GUI)
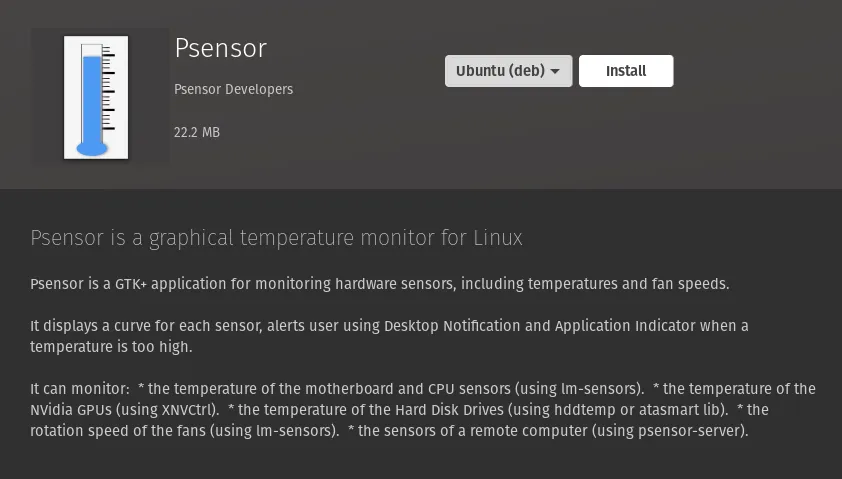
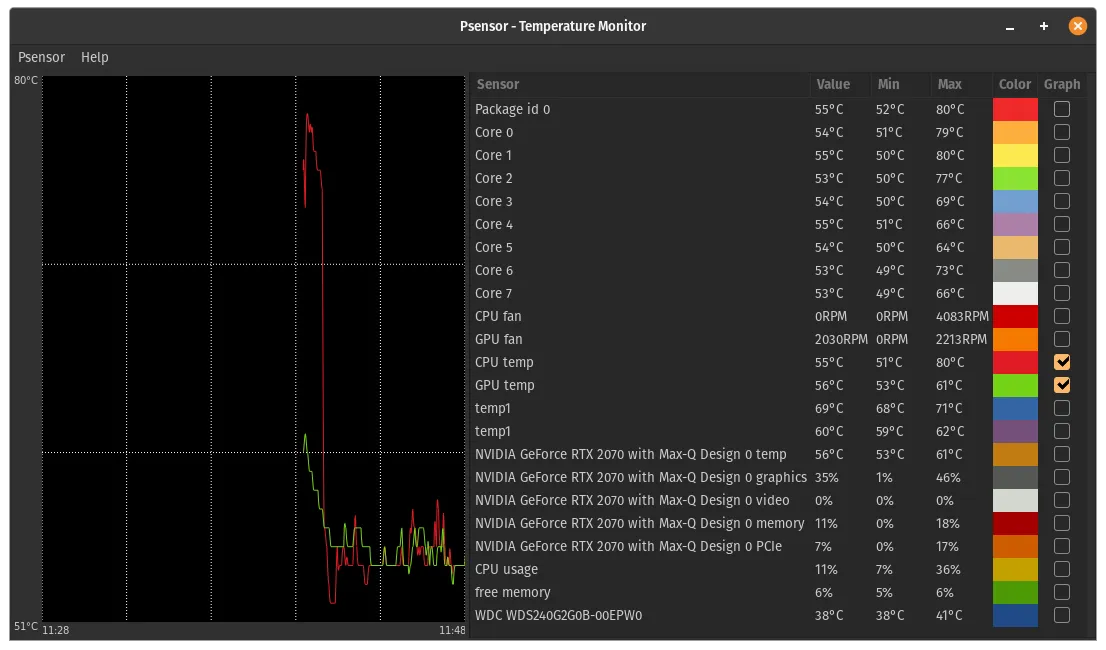
Section titled “Psensor (GUI)”If you prefer a GUI tool which provides graphing over time, the application Psensor can be installed from the Pop!_Shop, or through the Terminal with this command:
-
Install (
Terminal):Terminal window sudo apt install psensor -
Install Through Pop!_Shop
-
Run Psensor:
In a
Terminalrun:Terminal window psensor
Or, to launch through the OS interface, click on “Activities” in the top-left (Pop!_OS 20.04 LTS, or Ubuntu), or “Applications” (Pop!_OS COSMIC) and search for “Psensor”
High Temperatures
Section titled “High Temperatures”If the system temperatures are abnormally high, the fans may need replaced, and/or the thermal compound may need re-applied to the CPU and GPU cores.
Specific instructions for working on your hardware model can be found here
Quotes for replacement fans and thermal paste can be generated on open support tickets. To open a support ticket, visit this link
Machine Check Exceptions
Section titled “Machine Check Exceptions”Machine Check Exceptions are hardware failure events and can be logged with rasdaemon.service to journalctl. On Ubuntu based systems (and Pop!_OS) you can install via:
sudo apt install rasdaemonverify rasdaemon is active
systemctl status rasdaemonThen, after the system has crashed or been used for a period of time, take a look at the log:
journalctl -f -u rasdaemonIf there is no log or the log is empty, then the crash isn’t related to a hardware failure. The log will stay empty until a MCE happens. Take a look for “uncorrected” errors, as most “corrected” errors can be ignored. If there are a consistent number of “uncorrected” errors, the hardware should be examined.
Won’t Power On
Section titled “Won’t Power On”NOTE: If the system fails to power on, please use the following articles to troubleshoot: Desktops Laptops
Support
Section titled “Support”Please contact support by opening a ticket to get the system repaired or to have failed components replaced.